Wednesday, February 11, 2015

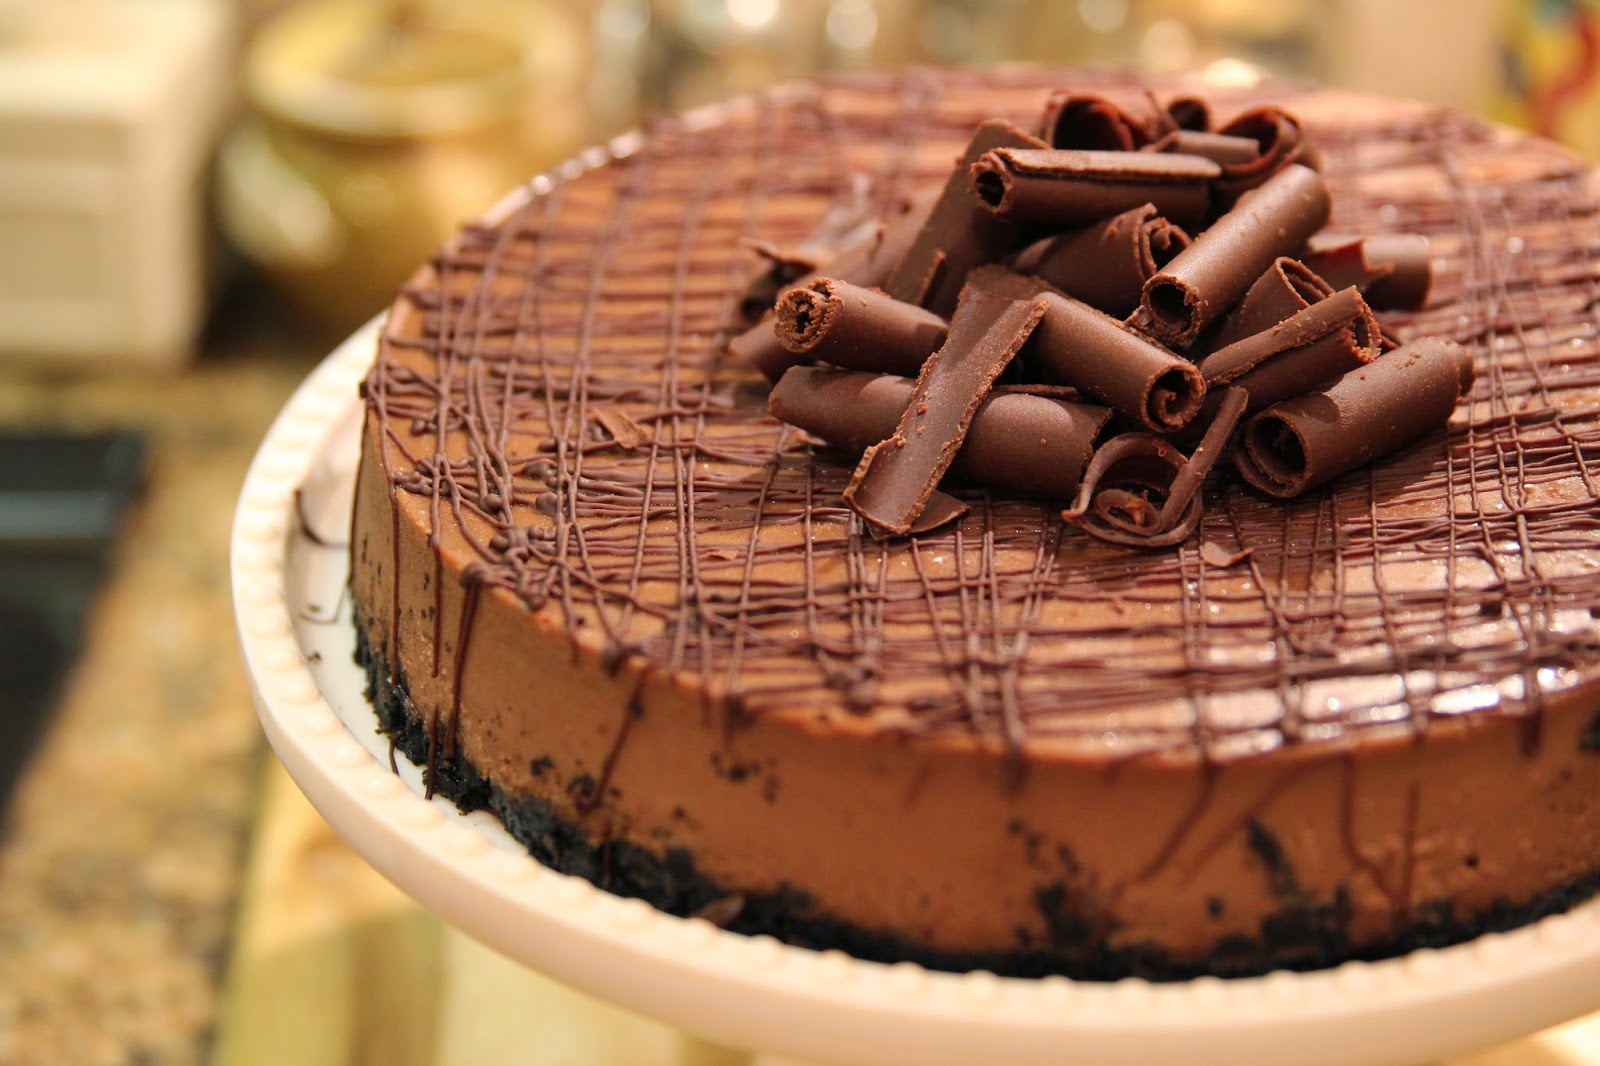
MILK CHOCOLATE CHEESECAKE WITH FRESH WHIPPED TOPPING AND RASPBERRIES


I have never been a really big fan of cheesecake.  But, the other day I saw a picture on the front of a magazine, and it looked so good that I found myself craving a slice. 
 
I have never made a cheesecake...because it seemed like a monumental task and, like I said, it has never been my favorite.  I do make some little cheesecake tarts, which I really like and have actually blogged...I know that doesn't make sense, soooo welcome to my world.  What I really like is CHOCOLATE!  Because it is Valentine's Day in just a few days, I decided this would be the perfect dessert for our Valentine's Bunco! 
 
I had a group of friends coming over to my house to play Bunco.  I've played in this group for close to 2 decades (that makes it sound like a really long time)!  We started playing when our children were very young.  I can remember all our girls always wanting to play.  I think our group has gone from being about the game to being about the food and the chatting.  Here are a few of the girls...some are missing so I will have to catch them later.
 
 
Stephanie, Tricia, Julie
Terri and Rebecca


Babette
D
Jolynn
Debbie and Tricia

 Two days and three cheesecakes later, I have decided that making a cheesecake is not that difficult but there are some things that you must do or must not do to ensure a cheesecake that is creamy and does not crack on the top.  I learned something with each one and the final one turned out perfect.  Here are some of the things I learned...

1.  Low and Slow is the name of the game when it comes to baking cheesecakes.  If you are in a rush, then you just need to wait or make something else.

2.  A water bath is a cheesecakes best friend.  The first recipe I tried said to just cover the cheesecake for the first hour and that would provide enough moisture but it ended up with a crack the size of the grand canyon.  The second one said to just place a pan of water in the oven.  But the third time, I placed it in a water bath and voila...creamy and no cracks.

3.  Bake and then turn the oven off and leave the cheesecake in the oven for an hour.  Going from one extreme temperature to another may cause cracks in the surface.  I was so paranoid that after an hour, I just opened my oven door and didn't take it out for another 30 minutes.  Probably unnecessary but I was just about tired of baking a cheesecake that look perfect only to have it crack at the end.

4.  Do not overbake.  When the cheesecake looks dry or firm on the sides but jiggles in the middle, turn off your oven.

5.  Make sure you scrape down the sides when beating the cream cheese and also, when incorporating the chocolate mixtures into the cream cheese. Also, check the bottom of the bowl to make sure there is no cream cheese lingering there.  You do not want any little cheesecake flecks showing up in your batter.  When I poured my cheesecake into my pan,  I used a spatula to urge it out of the mixing bowl but I did so very gently. 

I know this sounds like a lot of steps, but I am just telling you all the things I learned with three tries so that you will only need one try.  And it helps me remember the next time I make a cheesecake, since it will probably be a while.  I can't stop eating it and that isn't good when you are trying to lose some weight!

The best thing about this cheesecake is that you can make this ahead a day or two before you need it.  In fact, you should make it, at the very least, a day ahead because it needs 8-24 hours to chill and set.  Also, because it is so rich, you can serve 12 people smaller slices, and still have a slice or two left over. I had asked my sister-in-law to play bunco with us that night, but she was packing up to go and visit her grandbabies.  She loves Chocolate Cheesecake so I ran her and my brother in law a slice down to their house at around 9:30 p.m and before I left, it was gone, gone, gone!  Haha! 

If you have time, drizzle the chocolate over the cheesecake before serving.  Because the cheesecake will be cold, the chocolate drizzle will harden immediately.  Make those little chocolate curls on top, ahead of time, store in a bag in the freezer, and add to the cheesecake just before serving.  I had so much fun.  It was like magic, the way they curled up on their own.  The directions follow the recipe below.

So there it is, everything I learned about making a cheesecake.  I hope you try this recipe for the chocolate lover(s) you know...they will love you for it! 

HAPPY VALENTINES DAY EVERYONE!


MILK CHOCOLATE CHEESECAKE
WITH RASPBERRIES AND FRESH WHIPPED CREAM

16 Oreos
2 tablespoons sugar
2 tablespoons butter, melted
(2) 3.3 ounce Dove Milk Chocolate Candy Bars
1/3 cup Heavy Cream
4 tablespoons Sweetened Condensed Milk
3/4 cup sugar
1/4 teaspoon salt
2 tablespoons unsweetened cocoa
(3) 8-ounce packages Cream Cheese, room temperature
4 eggs, room temperature
2 teaspoons Vanilla

1.  Place oven rack in the middle of oven and preheat to 350 degrees. 

2.  Spray a 9-inch spring form pan with Baker's Joy and place on a 13 X 9 baking sheet.

3.  Break up oreos into smaller pieces and place in a food processor.  Add 2 tablespoons sugar.  Process for about 30 seconds.  Add butter.  Pulse 6 times.

4.  Pour oreo mixture into pan and tamp down with a measuring cup.

5.  Bake in 350 degree oven for 10 minutes.

6.  Take out of oven and off of baking sheet and place on cooling rack until cooled.

7.  Reduce oven to 300 degrees.

8.  Break up the dove chocolate bar into small pieces and place in a medium size, glass, microwave safe bowl.  Add the whipping cream and the condensed milk.  Place in the microwave at 50 percent power for 60 seconds, stopping to stir every 15 seconds until melted.

9.  Set aside to cool.

10.  In a small bowl, mix cocoa, salt, and 3/4 cup sugar until well incorporated. 

11. Place the cream cheese in a stand mixer fitted with the paddle attachment.

12.  In a small bowl, mix cocoa, salt, and 3/4 cup sugar until well incorporated. 

13. Add the cocoa mixture to the cream cheese, and beat on medium speed for 2 minutes, stopping to scrape bowl as needed.

14. Add the melted chocolate mixture and mix on medium-low until incorporated.  Make sure that all of the cream cheese is completely blended with the chocolate mixture.

15. Add one egg at a time on low until well incorporated.  Add the vanilla with the last egg.

16. Cover the bottom and up the sides with aluminum foil making sure to bring the aluminum foil up around the sides.  I used a couple of sheets going opposite directions.  The first sheet should be come up on all sides at least 1 inch so that the water will not get into the pan.

17. Pour cheese mixture on top of the cooled crust...DO NOT SCRAPE SIDES.  Any cream cheese bits could cause the cheesecake to split on the top when baking.

18. Drop the pan lightly on a hard surface a few times to cause the air bubbles to rise to the top and burst.

19. Place spring-form pan in a large baking pan and place in oven.

20. Pour boiling water into the pan to just about 1/2 inch up the sides. 

21. Bake for 1 hour and 5 minutes rotating once halfway through the baking time.

22. Turn off oven but do not open the oven door.  Leave the cheesecake in the oven for 1 more hour.

23. Take out of oven, but leave in the spring form pan.  I actually opened the oven door and let it stay in there for about 30 more minutes. I don't think you have to do this but after making 2 cheesecakes that split right down the middle at the end of the cooking time, I wasn't taking any chances.

24. Run a knife around the inside edge to make sure the cheesecake does not stick.

25. Let cool completely.

26. Remove the outer pan from the bottom.  Slide a spatula under the cake and slide onto a cake plate or stand.  Cover with wax paper, then plastic wrap and refrigerate for 8-24 hours before serving. 

27.  Before serving or after cheesecake has been in the refrigerator and is chilled, drizzle with the chocolate and top with chocolate curls.  Serve with raspberries and fresh whipped cream.


CHOCOLATE CURLS: I melted 1/2 cup semi-sweet chocolate morsels and 1 tablespoon of shortening in the microwave for about 30 seconds or until melted.  Pour out on the back of a baking sheet and smooth with a spatula. 


Place in the freezer for about 2 minutes.  Take out and touch the top with your finger.


  If it leaves a fingerprint, it needs about another minute in the freezer.  You want it to be just cold enough to not leave a fingerprint but not too cold or it will not roll properly.


Take a metal spatula and flip it over and scrape the chocolate slowly.  It should curl.  If it just crumbles, it is too cold.  Just give it a minute and try again.


CHOCOLATE DRIZZLE:  Melt 1/2 cup semi-sweet chocolate morsels with 1 tablespoon shortening and melt in microwave in a small microwave safe bowl for about 30 seconds or until melted. 

Pour into a Ziploc bag.  Slice the smallest piece off of one corner. 

NOTE:  Make sure your cheesecake is cold so the chocolate will harden immediately when it hits the cheesecake.  That is important so that there no running together, just straight and perfect lines.  Hold it about 8 inches above the cheesecake and working quickly in a back and forth motion.  Turn the cheesecake 180 degrees and repeat the motion.  You can use as much or as little as you want. 


ENJOY!


Monday, February 2, 2015

PUMPKIN BREAD


I think I got this recipe from my sister-in-law, Judy.  I found it in a bag of torn-out and copied recipes that I keep and add to from time to time.    I am so glad I found it because my little grandson loves Pumpkin Bread and I wanted to make him some.
 

This little munchkin came over today and he scarfed down a slice of that bread!


I think the ingredients in this recipe set it apart from other pumpkin bread recipes.  First of all, it has half the oil of most recipes because it incorporates ricotta cheese in its place.  Also, it calls for either milk or orange juice and I thought orange juice would pump up the flavor a bit.  Equal parts of brown sugar and white sugar are what sweetens this recipe and I used the dark brown sugar because I wanted more of that deep molasses flavor. 
 
 
Something I like to do is to grease my loaf pan by spraying it with Baker's Joy.  I then cut a piece of parchment paper that fits at the widest part of the pans and hangs out of both sides.  This step will keep the bread from sticking to the bottom of the pan.  Also, when the bread is done you just simply grab both ends of the paper that is hanging out and lift it out of the pan to cook on a rack.


This recipe makes two large loaf pans so it is perfect to keep one loaf of bread for you and freeze one or share it with a friend.  So simple to put together, and it will make your kitchen smell like a spiced fall candle!  Now that is reason enough to try this recipe : )  
 
He loves his pumpkin bread!


PUMPKIN BREAD
Preheat oven to 325 Degrees
 
 
3 cups All Purpose Flour
1 tablespoon + 1 teaspoon Pumpkin Pie Spice
2 teaspoon Baking Soda
1-1/2 teaspoon Salt
1-1/2 cup Granulated Sugar
1-1/2 cup Light or Dark Brown Sugar (I used dark)
1 can (15 ounce) Libby's 100% Pure Pumpkin
4 Large Eggs
1/2 cup Vegetable Oil
1/2 cup Whole Milk Ricotta Cheese
1/2 cup Orange Juice or Milk (I used Orange Juice but I might try Milk next time)
1 teaspoon Vanilla
NOTE:  You can add 1 cup of Walnuts or Dried Cranberries, if you like
 
Place all of the dry ingredients in bowl and mix until well blended.
 
Place all liquid ingredients in blender until well blended.
 
Pour liquid ingredients into dry ingredients and mix just until well blended.  Do NOT over mix as it will develop the gluten in the flour.
 
Divide batter between two large loaf pans.
 
Bake in a 325 degree oven for approximately 60 minutes or until a wooden toothpick inserted comes out clean.


ENJOY!!


Saturday, January 31, 2015

CHILI CON QUESO


I have been looking for a good Chile Con Queso dip for a long time.  I wanted a cheese dip that was smooth, creamy, cheesy, and flavored with spices and veggies like they have at some of the restaurants I go to.

I found this recipe in my little bag of torn out recipes.  I have been tearing out recipes for years but I haven't made many of them.  I decided to change that the other day and that is when I found a page copied out of a magazine that a friend gave to me.  It sounded just like what I wanted so I decided to make it last night.  For some reason, it turned out kind of gritty.  I thought about it this morning and talked to my son and decided I would make some changes.

This recipe is just a faint resemblance of the recipe I started out with.  It called for flour in the recipe to make a roux.  I did not add flour this time because I thought that might be what was causing it to be kind of gritty.  It called for Monterey Jack cheese and I used a combination of Monterrey Jack and White American cheeses.  I added fresh garlic and garlic powder along with some chopped celery. I used Half and Half instead of milk, but less of it and I added a little more butter and a half the beer that it originally called for.  So, now you see what I mean?  Instead of a making a recipe with a twist, it is a full 180! Haha!

You know what I really like about it besides the amazing flavor?  It is the fact that the dip does not sieze up....it stays creamy....for hours.  I made it before going out with a friend.  We were gone for about 3 hours and when I got back it was still creamy....perfect texture.  I hate when I bring my left over chile con queso home from a restaurant and it turns into a brick.   

Well its late and I need to get to bed so here is the recipe!  Hope you like it!


CHILE CON QUESO

3 tablespoons of Butter
1 (4 ounce) can Green Chiles, chopped
1 cup Onion, minced
1/4 cup celery, minced
2 garlic cloves, minced
3/4 cup Half and Half
1/4 cup Beer, (I used Dos Equis)
4 ounces of Monterey Jack Cheese, shredded
4 ounces of White American Cheese, shredded (found behind deli counter)
1 teaspoon ground Cumin
1-2 teaspoons Garlic Powder
1/4 teaspoon Salt
Tortilla Chips

1.  Melt butter in a large, heavy saucepan over medium heat.  Add green chiles, onion, celery, and garlic and cook 3-4 minutes or until all veggies are softenend.

2.  Pour in the Half and Half and stir until well blended

3.  Pour in the beer and let it cook for about a minute

4.  Add the shredded cheese, one handful at a time, making sure cheese melts before you add another handful.

5.  Stir in Cumin, Garlic Powder, and Salt.

6.  Serve with tortilla chips.


ENJOY!


AUTHENTIC BEEF ENCHILADAS


These are literally the best enchiladas I have ever had!  I am not even joking!  The first time I tried these enchiladas was at my friend, Stephanie's house.  She had made it for Bunco and before I left I asked her for the recipe.  This is only my second time to ever make them, but that is about to change.  Oh and I did not name this recipe....it is just what it is called by America's Test Kitchen magazine.  I don't know if these are truly "authentic",  I just know they are delicioso : )

Honestly, I thought I remembered them taking longer than they really do.  I found a couple of time savers this time around and I will be making them way more often.  First of all, you can make some of this ahead of time and refrigerate.  Also, when it has to cook for 1-1/2 hours, instead of leaving them on top of the stove, place them in the oven or in a crock pot for the sauce to cook down and the meat to tenderize.


I love the flavor of the gravy so much.  It is soooo rich and flavorful.  That gravy holds nothing back. Oh and the smell in your kitchen....you will just die!  It smells AHHH-MAZING!!  This recipe makes 12 enchiladas using the smaller corn tortillas and going by the amounts in the recipe.  If you need more, this recipe is easy to just double, triple or quadruple.

This dish adds one layer of flavor after another.  It incorporates lot of fresh ingredients, as well as wonderful spices that make your taste buds wake up and take notice!  Don't skimp on any of the ingredients because each one is there for a reason.  They balance this dish and make you eat another enchilada when you are already full.  Yep, been there, done that!


Oh and one more thing, I found an amazing gadget last week at a little shop in Boerne, Texas called Kiss The Cook.  I use a lot of fresh herbs that require you to remove them from the stem.  It is so time consuming  that a lot of times I just chop up the stems too.  This gadget actually removes the leaves from the stem effortlessly.  Yesterday, I used it with the cilantro and it was so easy and quick to get just the leaves for this dish.  It has 8 holes of all different sizes.  There is a hole big enough for Kale and one small enough for Thyme.  I love it!!
One
Two
Three
                                             
End Product
Back to the dish!  These would be perfect for your Super Bowl party, dinner party, bunco, family dinners, etc.  I am sitting here thinking that all this talk about these enchiladas is making me hungry for one.  Hope you try them...you won't be disappointed!


AUTHENTIC BEEF ENCHILADAS 


3 Garlic Cloves, minced (I doubled this because I love garlic)
3 tablespoons Chili Powder
2 teaspoons Ground Coriander
2 teaspoons Ground Cumin
1 teaspoon Sugar
Salt for seasoning meat
1-1/4 pounds Top Sirloin Steak or Top Blade Steak
1 tablespoon Vegetable Oil (I used Canola)
2 onions, chopped (about 2 cups)
(1) 15 ounce can Tomato Sauce
1/2 cup Water
8 ounces Monterey Jack or Mild Cheddar Cheese, shredded (I used a Mexican Blend)
1/3 cup Fresh Cilantro
1/4 cup canned Pickled Jalapenos, chopped
(12) 6-inch Corn Tortillas

1.  Combine the garlic, chili powder, coriander cumin, sugar, and 1 teaspoon of salt in a small bowl.


2.  Pat the meat dry with paper towels and sprinkle with salt.
You only use 1 package

3.  Heat the oil in a Dutch Oven over medium-high heat until shimmering.  Cook the meat until browned on both sides, about 6 minutes.  Transfer the meat to a plate.

4.  Add the onions to the pot and cook over medium heat until golden, about 5 minutes.

Don't worry about the browned bits on the bottom of your dutch oven.  The moisture from the onions will steam them right off and into your base for a yummy addition to your gravy!

5.  Stir in the garlic mixture and cook until fragrant, about 1 minute.

6.  Add the tomato sauce and water and bring to a boil.

7.  Return the meat and juices to the pot, cover, and reduce the heat to low, and gently simmer until the meat is tender and can be broken apart with a wooden spoon, about 1-1/2 hours.

Make sure your meat is completely submerged in the sauce.

NOTE:  I actually placed my dutch oven with the meat into the oven at 350 degrees for 1-1/2 hours and it was perfect.  You could also use a crock pot but since I have not done this personally, I cannot tell you a cooking time...my guess would be 4-5 hours.

8.  Remove the meat from sauce, place in a dish and shred.  Reserve the sauce.

9.  Add 1 cup of the cheese, the cilantro and the jalapenos to the meat and mix well.


10.  Spread  a good amount of the sauce onto the bottom of a 13 X 9 baking dish.
11.  Microwave the corn tortillas, 6 at a time, in a dampened paper towel for about 20 seconds.
12.  Spread 1/3 cup of the meat mixture down the center of each tortilla (I just eyed this), roll the tortillas tight, and place in the dish.  Repeat this with the remaining tortillas and beef mixture (you may have to fit 2 or more enchiladas down the sides of the baking dish).
I used my hands to put the meat in the tortillas...that way I can get it just right.


13.  Pour the remaining sauce over the enchiladas and spread to coat evenly.
14  Sprinkle the remaining 1 cup of cheese evenly over the enchiladas, wrap with foil and bake at 350 degrees until heated through, 20-25 minutes.  Remove foil and continue baking until the cheese browns slightly, 5-10 minutes more.


TIP:  Although it is best to roll and bake the enchiladas right before serving, the beef filling and sauce can be prepared ahead through Step 9 and refrigerated : )  Prepare the enchiladas and increase the baking time when dish is covered by 5 minutes.

ENJOY!


Monday, January 26, 2015

COLD OVEN POUND CAKE WITH STRAWBERRIES AND WHIPPED CREAM


Last March my grandson, Alex, had his first birthday party.  It was a farm themed party and soooo cute.  Alex had a birthday smash cake but my daughter and I made these cute little desserts out of empty baby food jars and served them to the children instead of birthday cakes or cupcakes.  It was so simple to do.  We used my pound cake recipe, topped with chopped, fresh strawberries and homemade whipped cream.  We used a stamp to put the "happy birthday" on the wooden spoons. I purchased both from Etsy (it has been a year so I cannot remember which companies though).  Just look for mini wooden dessert spoons. Then we wrapped the spoon around the jar with decorative colored string.

It occurred to me that this dessert and idea would be perfect for bringing to a Super Bowl party.  For the Patriots, you could wrap the jar with blue and red string and still use the fresh strawberries.  For the Seahawks, you could use fresh blueberries and wrap the jar with blue and green string.  You could do a mixture if you are not sure who you want to win.

You have 6 days to hit up any friends who have small children to save their baby food jars so start now.  I think we made about 30.

This dessert is super easy and it looks so festive. 

One of the best parts is you could actually make your pound cake anytime this week, wrap it in saran wrap, and then put it in the freezer.  Take it out the night before and let it thaw.  Chop your strawberries and whip up some fresh whipped cream.  Blueberries just have to be rinsed.  If you don't want to make your own whipped cream you can use Cool Whip.  I will say though, there is a big difference between the two.  I would definitely go to the extra trouble.  It only takes about a minute or two.  Make sure no one throws their jars away.  Just pop them in the dishwasher and put them away for your next party!  These jars are so versatile.


SUPER BOWL MVP PARFAITS

Pound Cake (click here to go to my recipe)
Don't forget you can make this ahead and freeze, taking it out of the freezer the night before you  want to use it.

Strawberries (chopped into bite sized pieces)Blueberries, Raspberries (whatever fruit you like),

Fresh Whipped Cream (or Cool Whip)

Cube your pound cake into small, bite-size pieces (You may not need it all so I would just start with half of the cake.  Save the rest to serve in slices, if you like)

Place a dollop of fresh Whipped Cream into the bottom of the jar

Place a few pieces of cubed pound cake.

Gently spoon berries on top...leave room for the whipped cream.

Put a dollop of whipped cream on top of the berries.

Place a couple of chopped strawberries, blueberries or a raspberry on top.


FRESH WHIPPED CREAM

1 cup of Whipping Cream
1 tablespoon sugar
1/2 teaspoon vanilla

Put bowl that you will use to mix in into the freezer for at least 15 minutes with the beaters.

Take bowl out of freezer and pour in whipping cream, sugar and vanilla.

Beat on high until stiff peaks form.

Do not beat too long or it will become lumpy like butter.

ENJOY!