Tuesday, June 9, 2015

BREAKFAST CASSEROLE


This casserole is going down as my new favorite large-crowd breakfast dish!  Actually, this can be halved so it is going down as my new favorite breakfast dish...period!   It is so versatile and you can take it in any flavor direction that you want just by changing your spices.

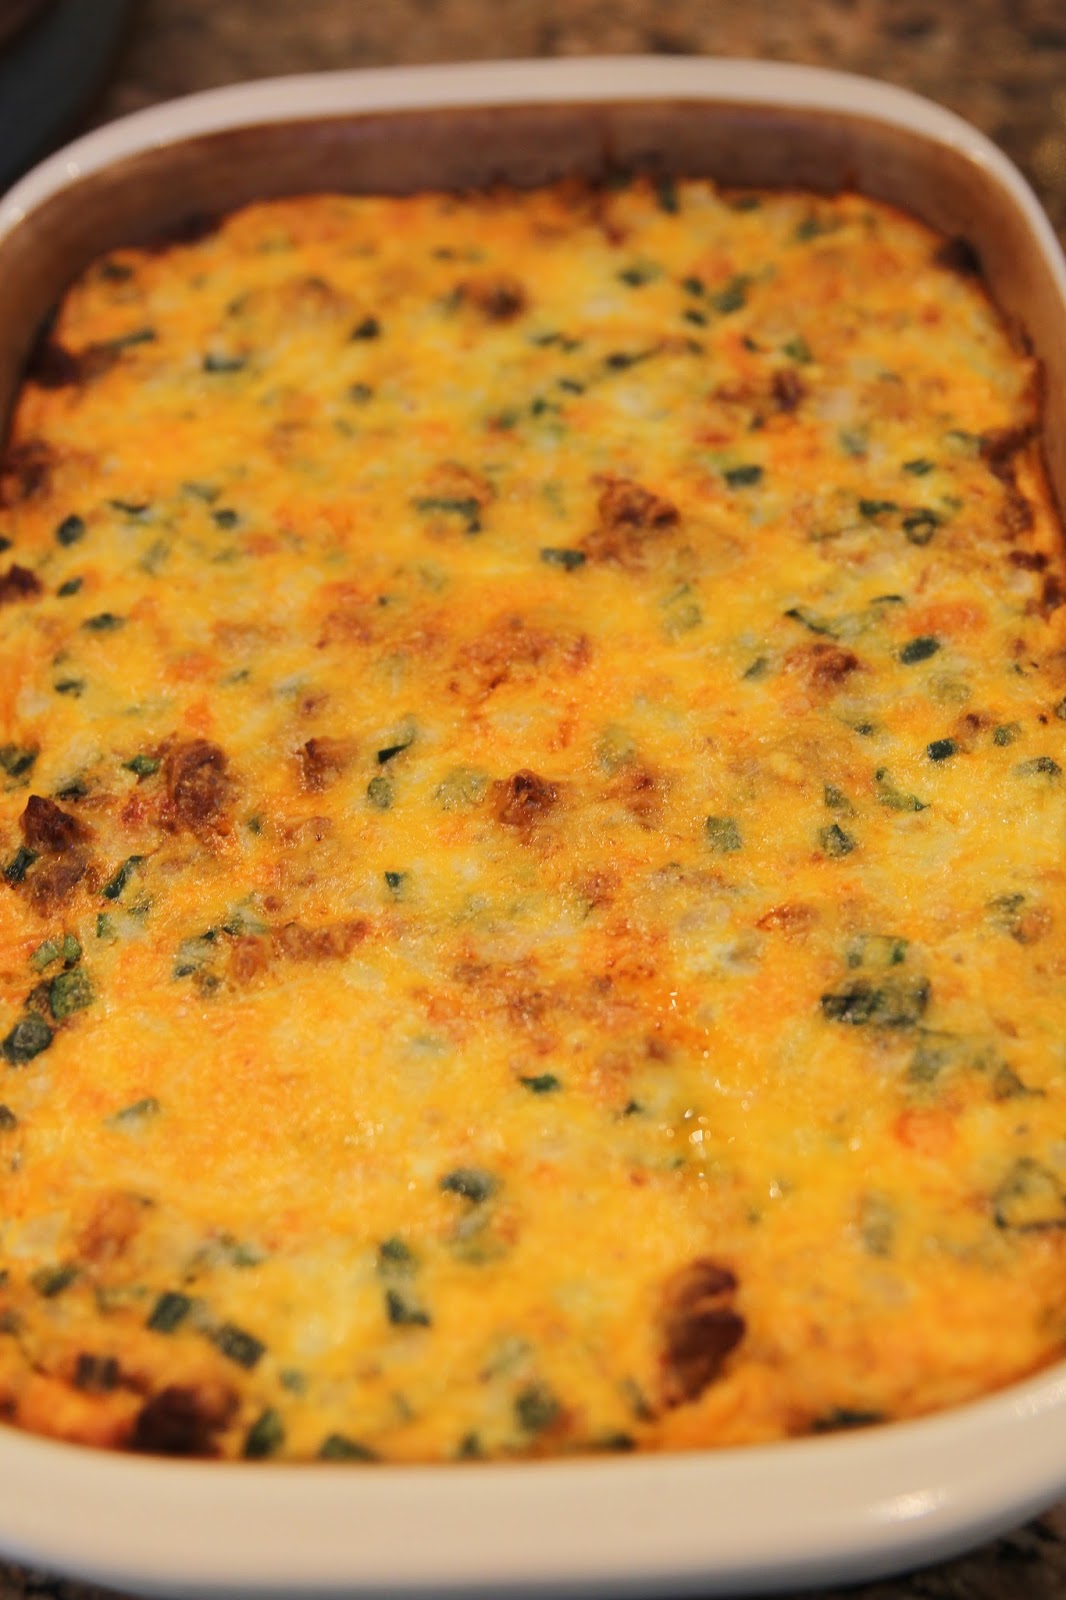
I wasn't sure how this recipe was going to turn out so I didn't take a lot of pictures.  In fact, I only took two!  So wish I would've taken a picture of the layers of cheesy eggs, on top of sausage, on top of golden fried potatoes.  It was pure divine yumminess.  Not guilt-free, but this isn't something I would eat everyday.  I probably will save this dish for special times such as Christmas morning, brunch with friends, or when I have company!

My son made a dish similar to this while we were on vacation.  I called him to ask him what he put in it but he didn't write it down, or have a recipe either.  He just combined flavors that he liked, so I just did the same thing.

I have never cooked Chorizo sausage but I will be cooking it from here on out.  It was packed with so much spicy flavor that it brought the casserole up a notch...or two....or three!!  My son used fresh, russet potatoes in his casserole but I just didn't want to go to the trouble.  I was looking for a shortcut and I thought of the potatoes.  I didn't want to have to get up early to peel and chop potatoes and the OreIdas do all the work for you, so there you go.  However, if you want to make it all completely from scratch, then you definitely could.

I used three different skillets only because I didn't have a recipe and had not thought the whole thing through.  But, I wrote this recipe to help, you and me both, cut down on the amount of skillets used and therefore, cut down the amount of cleanup involved.  I love to cook but I HATE to clean up!

I made this for breakfast for friends and I served it with Salsa, fruit, and blueberry muffins.  My husband came home and ate it for lunch.  It is one of those dishes that can be served all day long, and, actually, for any meal.

Invite some friends over for this breakfast casserole and coffee...it is a great way to start the Summer off right!

HAPPY SUMMERTIME Y'ALL!


BREAKFAST CASSEROLE
(Serves 8-10 depending on what else is served and how big the appetites are)

1 - 32 ounce bag frozen Ore Ida Diced Potatoes
4 Tablespoons Canola Oil
2 teaspoons Chili Powder
1 teaspoon Cumin
Salt and Pepper to season the potatoes
1 lb. Chorizo Sausage
1 lb. Breakfast Sausage (I used Owen's Mild)
16 Eggs
1/4 cup Sour Cream
Salt and Pepper to season the eggs
1 medium Onion, diced
1 bunch Green Onions, chopped
1 medium Poblano Pepper, diced
4 cloves Garlic, minced
1/4 cup Cilantro, chopped
2 cups Cheddar Cheese, shredded
2 teaspoons Chili Powder
1 teaspoon Cumin

1.   In a large non-stick skillet over medium high heat, heat the canola oil.

2.   Add the Potatoes and sprinkle the chili powder, cumin, salt and pepper over them.

3.   Cook the potatoes, without turning, for about 10 minutes.  Turn the potatoes and cook another 7-10 minutes until golden brown.

4.   Spray a 13 X 9 baking dish with Pam and then place the potatoes in evenly.

5.   In the skillet you cooked the potatoes, or another skillet, brown the chorizo and the breakfast sausage.  Scoop the cooked sausage onto the potatoes evenly.

6.   You can either save some of the grease from the cooked sausage or you can start fresh with canola oil or butter to saute the veggies.

7.   In the skillet you used for the sausage or another skillet and using about 2-3 tablespoons of the sausage grease, canola oil, or butter, add the onion, green onions, garlic, and poblano pepper.  Cook until softened.

8.   Whisk or beat the eggs and the sour cream.  Add the cooked veggies, cilantro, cheese, chili powder, cumin and salt and pepper to taste.  Stir to combine.

9.   Pour the egg mixture over the potato and sausage mixture.

10.  Bake at 350 Degrees for 35-45 minutes until golden brown and center is set.


ENJOY!


Friday, March 27, 2015

TWICE BAKED POTATOES


TWICE BAKED POTATOES

4 large Baking Potatoes
8 slices Bacon, cooked until crispy,  divide in half
1 cup Sour Cream
1/2 cup Milk
4 tablespoons Butter
1/2 teaspoon Salt
1/2 teaspoon Pepper
1 cup shredded Cheddar Cheese, divided in half
8 Green Onions, chopped and divided in half

Preheat oven to 400 Degrees.

Bake for 1 hour or until a fork goes through the middle of the potato with ease.  The time will depend on the size of the potato.

When potatoes are done, set aside for 10-15 minutes to let them cool a little bit.

Decrease heat in the oven to 350 Degrees.

Slice the potatoes in half lengthwise and scoop out the middle.

Place the potatoes on a baking sheet.

Put the scooped out potato in a large bowl and add the butter and half of the cheese.

When cheese is melted, add the sour cream, butter, milk, half of the green onions, half of the bacon, salt and pepper.  Mix by hand, or with an electric hand mixer, until all are incorporated.

Spoon evenly into each potato and top with the rest of the cheese, green onions and bacon.


Place in the oven for an additional 15 minutes or until the cheese is melted on top.

Serve immediately.

ENJOY!

Tuesday, March 24, 2015


KEY LIME PIE

Graham Cracker Crust

Preheat Oven to 375 Degrees.

18 Graham Cracker Squares (1 package (not box) equals this amount)
6 tablespoons Butter, melted
1/4 cup Granulated Sugar

Place graham crackers in a food processor and process until they are finely ground.

Combine the graham crackers crumbs with the melted butter and sugar and mix until well combined.

Press into the bottom and up the sides of a 9 inch pie plate.

Bake for 7-9 minutes.

Remove from oven and place on a cooling rack.

Bump oven temperature down to 350 Degrees for the pie filling.

Filling:

4 Egg Yolks
(1) 14 ounce can Sweetened Condensed Milk
2-1/2 ounces Key Lime Juice

Combine egg yolks and milk at low speed.  Slowly add juice.

Pour into the pie crust.

Bake at 350 Degrees for 12-15 minutes.

Remove from oven and place on a cooling rack until completely cooled.

Top with Fresh Whipped Cream

Whipped Cream Topping:

1/2 Pint Heavy Whipping Cream
1/8 cup Granulated Sugar
1/2 teaspoon Vanilla

For the best results, place your beaters and bowl in the freezer for about 15 minutes before starting this recipe.

Take beaters and bowl out of freezer and pour all the ingredients into the bowl.

Beat at high speed until it is creamy and thick, approximately 2-3 minutes.

Spoon on top of your COOLED Key Lime Pie and place in the refrigerator until ready to serve.


ENJOY!


Friday, March 13, 2015

MINI CHICKEN AND BROCCOLI POT PIES


A friend of mine, Debbie Holst Gutierrez, alerted me to the fact that it was National "Pi" Day.  Not your ordinary Pie day, but she was making this really scrumptious looking Dark Chocolate Salted Caramel Oreo Pie,  Well this got me to thinking that I should "celebrate" this day too.  And that is why I ended up making these little delights.

I saw these the other day on Giada At Home, and since my 2 year old grandson, Alex, loves chicken and he loves broccoli, I thought these would be the perfect little bite-sized pot pies for his little hands.  He didn't eat one because he saw his other "love" on the counter moments before we ate....Macaroni and Cheese....it wins out everytime.  Oh well, I enjoyed making them and they were packed with really fabulous flavors.

I will say that these are a little time consuming so if you do not have time, just go ahead and using this filling to making one big pot pie. You will have to cook longer...maybe 30-45 minutes and probably back the heat down a little, but they would still be good.  In fact, I did both.  I doubled this recipe and made the mini's, and also made some individual pot pies that would feed 2 a piece.  I served this with a fruit salad but I think carrots would be great too.

They looked like little mini-quiches.  Wouldn't these be cute for a brunch or a bridal/baby shower?  I think they would be cute to announce that you are having a baby and make everything on the plate little, like little baby carrots, little new potatoes, etc.  They would also be perfect if you were announcing that you were having a new little grandbaby like I am!!

YES!!!! I AM HAVING A NEW GRANDBABY!!!

AND IT IS A BOY!!!!

AND HE IS DUE IN SEPTEMBER!!!

How is that for an announcement?? Haha!!

My daughter, Crystal and her boyfriend Ryan are expecting their first baby boy mid-September.  We are over the moon excited about this new little blessing that is on his precious little way.  This Nannie's heart swells every time I think about it!

I think your kids will  love these, but I loved them just as much....and the extra bonus was that I am expecting a very wonderful package in September!!  Love to you all!


MINI CHICKEN AND BROCCOLI POT PIES
(Makes 12 Minis)

Preheat oven to 400 degrees

1 Box of Refrigerated Pie Dough (2 10-inch pie rounds...I used Pillsbury)
2 tablespoons Flour
2 tablespoons Butter
2 Garlic Cloves, minced
3/4 - 1 cup Whole Milk, room temperature
1/4 cup of shredded Parmesan Cheese (fresh grated is the best)
Salt and Pepper to your liking
1 cup Rotisserie Chicken Breast, chopped small
1 cup fresh Broccoli, steamed and chopped small
1 egg, beaten

Melt the butter in a medium saucepan.  Add your garlic and saute for about 30 seconds.  Stir in the flour and cook for about a minute to remove the raw flour taste.


Whisk in the milk, stirring constantly to avoid lumps.  Stir until thickened like a gravy.

Add the Parmesan Cheese and stir to combine.

Taste now to see if you need more salt.  Add pepper to your liking.

Add the chicken and the broccoli.  Stir to coat the pieces.  Remove from heat and set aside.

Using a 3 inch round cookie cutter, cut out 12 rounds.

Using a 2 inch round cookie cutter, cut out 12 rounds.

Grease your mini muffin pan.  I use spray Olive Oil.

Place one 3 inch round in each hole of the miniature muffin pan and work to make sure it is even and comes out of the opening at the top a little all around.  Lightly flatten the edges.

Put a small amount of chicken/broccoli filling in each hole.  Not too much, because you do not want that coming out.

Using a pastry brush, brush some of the egg mixture around the flattened edges and place the 2 inch round piece of pastry on top.  The egg acts like a glue.  Lightly, mash to seal the edges.  After this step, you could use a fork to lightly make marks all around the edge....it just looks cute.

Brush a little more of the beaten egg on top.  It turns the top a beautiful, golden brown when baking.

Next, make a slit on top of each mini pot pie so that the steam can escape while cooking.

Place in the oven for 15-18 minutes.

When they come out, I would let them rest for about 5 minutes before attempting to remove them from the muffin pan.  When they are cool, they come out perfectly but when they are hot, they need a little coaxing.

I just got a small pan and placed it gently on top of the muffins, so not to mash them.  Then I flipped them slowly upside-down and just left them like that for about 30 seconds.  There may be some that are stubborn so if you can wait just a few more minutes, they should come right out or you can try "helping" out of their spots.

And there you go, little mini Chicken and Broccoli Pot Pies.

ENJOY!

CLICK HERE FOR PRINTABLE RECIPE


Tuesday, March 3, 2015

CHICKEN ENCHILADA SOUP


Yesterday, I had painters at my house so I couldn't go anywhere.  I kind of like it when that happens.  It means I have to stay home and I can just stay in the kitchen, where I love to be!

I had chicken, some fresh thyme, fresh oregano and parmesan cheese so I was thinking I would make some kind of Chicken Italian soup.  But, I had the Food Network on and someone was caramelzing onions.  It looked so delicious that I started trying to figure out how I could incorporate those onions into my soup and then for some reason, I cannot tell you why, I thought Chicken Enchilada Soup sounded really good.  So good in fact, I completely changed gears and went that route instead.

Now I have never made Chicken Enchilada Soup, I have only eaten it.  My favorite is at Chili's restaurant, but I bet I haven't been to Chili's in 2 years or more.  Every time I would go, I would always get the Chicken Enchilada Soup as a starter.   Anyway, I don't know why, all of the sudden, I started craving it.  I went online to get a base recipe of what an enchilada soup should have.  One of the things it needed was masa flour.  I had some in the pantry but, of course, it was out of date...I don't even remember using it, so it was oldddd.  I already had everything else.  I didn't go by the recipe, I just used it as a guide to get some of the foundation right like how much masa flour to how much liquid.  Aside from that, I did my own thing.  I added and tasted, and added and tasted and then to figure out what needs to be added.  Yesterday, I had a helper.  My taster was my daughter Holly and she was a big help.  We added a couple of things that made the difference between a good soup and an awesome soup!

Since this is my first time to develop and make this recipe, I have only tried it with caramelized onions, so I don't know if just sauteing them would be enough or not...sorry.  But really, these onions do not have to be full out caramelized.  Even slightly caramelized would enhance the flavors of this soup.

I made some mini Jalapeno Cheddar Cornbread Muffins to go with this and they were just the perfect thing to amp up the flavor even more.

This recipe is going on my favorite list....I love it when that happens!


CHICKEN ENCHILADA SOUP

2 pounds Chicken Breasts
Garlic Powder
Steak Seasoning
1 large Onion, chopped
2 tablespoons Butter
2 tablespoons Granulated Sugar
6 Garlic Cloves
1/2 - 1 large Poblano Pepper, chopped
1 Package McCormick Enchilada Sauce Mix
1- 8 ounce can Tomato Sauce
1-1/2 cups Water
6 cans Campbell's Chicken Broth
2 cups Water
2 cups Masa Flour
1 Cup Water
2 tablespoons Chili Powder
2 teaspoons Cumin
1 - 10 ounce bag of frozen Corn 
Optional:  1 or 2 cans of Black Beans
8 ounce Sharp Cheddar Cheese, chopped into chunks
Salt to Taste.
Toppings:
Charred Corn
Shredded Cheddar Cheese
Cilantro
Green Onions

1.  Season chicken breasts heavily with garlic powder and steak seasoning.

2.  Place in a 400 degree oven for 45 minutes or until done.  This will depend on the thickness of the breasts.
I only used the breasts...I saved the thighs for something else.

3.  In a small pot, make the enchilada sauce according to the directions on the package.  Set aside.

4.  In a soup pot, melt butter, add sugar and stir.  Add the onions and and cook on medium high heat, stirring frequently, until the onions are medium brown in color. 


5.  Add garlic and cook for about 2 minutes.

6.  Add poblano pepper and cook for another 3-5 minutes.

7.  Add the Chicken Broth and stir well over medium to high heat.

8.  Combine the Masa and 2 cups of water and whisk until creamy and all is dissolved.

9.  Whisk into the soup mixture until it is all mixed in well.

10. Add the last cup of water and stir.

11. Add all of the the Enchilada Sauce.

12. Sprinkle in the chili powder, cumin and stir until all is combined well.

13. Add frozen corn.

14. Add the chunk cheese and stir until all is melted and incorporated.

15. Add your chopped chicken breasts. 
16. Let cook for about 15 minutes.

17. Now is the time to add salt, if needed.  Taste first but remember that Salt is a flavor enhancer so don't be shy!

Top with your choice of toppings.


ENJOY!


Friday, February 27, 2015

BEST YOGURT PARFAIT EVER


Now tell me, doesn't this look like it is just going to be divine?  I am here to tell you, IT IS!!

I was cleaning out a room the other day, getting ready for some remodeling, so I just had Pioneer Woman playing on the television.  I looked up when she started talking about this little treat.  She had me intrigued because she was just gushing over this Greek Yogurt (that is an anomaly to me...not a fan).  She said her Mom taught her how to make it and she described it as "the best thing she has ever put in her mouth"!

I have been battling a sinus infection and on antibiotics, for what seems forever.  I was just thinking that I needed to be eating some yogurt to get some of that balance back in my gut, so she had me there too.  I watched her make it and it was simple enough, but what she did to the yogurt is where she got me hooked into trying it.

She started off with a container of Greek Yogurt but then she added heavy cream, brown sugar, and vanilla, and then finished it by layering it with fresh assorted berries.  I went to the store the next day and made it this morning.

I could not put my spoon down, it was just that good.  I know it has sugar and heavy cream but surely the yogurt and fresh berries cancels out any bad that could do....please tell me that is the truth!!  What a perfect little dish for serving to your family for breakfast, your girlfriends for brunch, or just for anytime you want a snack or light dessert....I so think this could be considered dessert : )

It took me less than 5 minutes to mix up...20 minutes in the fridge...3 minutes to assemble....what could be easier or less trouble.  I think I can safely say that this would make a Greek Yogurt lover out of any hater!  Try it and let me know!


BEST YOGURT PARFAIT EVER

(1) 17.5 ounce container Greek Yogurt (I used Fage)
1/2 cup Heavy Cream
1/2 cup Brown Sugar (I used half light and half brown sugar, but it could be either and be great)
1 teaspoon Vanilla
Assorted Berries
Almonds, Walnuts, Granola
Extra Brown Sugar

Spoon the container of yogurt into a medium size bowl.


Add 1/2 cup heavy cream and teaspoon of vanilla to the yogurt.  Using a whisk, combine until well incorporated and creamy.

Sprinkle the 1/2 cup of brown sugar over the top of the yogurt mixture but 
DO NOT STIR.


Cover with plastic wrap and place in refrigerator for at least 20 minutes.


In a parfait glass, or a small bowl, put a handful of berries.

DO NOT stir the brown sugar into the yogurt, but rather just dip your spoon all the way to the bottom and back up again grabbing some of the yogurt with the brown sugar, and dollop onto the fruit.  Repeat.


Top with a little bit of brown sugar, granola, nuts, if you like.

ENJOY!

Friday, February 20, 2015

SUSIE'S SUGAR COOKIE FRUIT TART (formerly and affectionately known as Fruit Pizza)


If you add fruit to a dessert, it makes it healthy....right?  Makes sense to me and so that is how it shall be...bippity, boppity, boo!

My daughter just turned 27 years old last week and we celebrated with a shopping trip and overnight stay in Houston. 


One of my favorite pictures from that birthday trip!


I always cook for my babies, (my kids no matter their age), for their birthdays so we kept the celebration going and ended it last night with this delightful little piece of dessert heaven. This would be such a fun dessert to make with little ones.  They could mash the cookie dough into the pan, spread the frosting and place their fruit in any design they would like!  How fun for them and it lets them be creative.  My grandson was more into running and dropping my tomatoes on the floor. LoL!!  I stopped and got a picture because he is only going to be little once and I love seeing him happy!  Actually, in all fairness, I think that at the time of decorating the cookie, he was totally immersed in the show Rio and this boy gets in a zone when a beloved movie like Horton Hears A Who or Madagascar or Toy Story is on the big screen! Ha!


Do not underestimate my ability to find a way to share a pic or 2 or 3 of my grandbaby! LoL!

The name, Fruit Pizza, just does not do this dish justice.  I mean it has a sugar cookie crust, so already that is a pretty awesome dessert, then you add a cream cheese frosting, topped with lots of fresh, lovely fruit, and, at last, drizzled with a fruit juice glaze and to me that is more than it's name implies.  What would be a good name....large fruit tart...mmm no...or fruit sensation....ehhhh....how about Sugar Cookie Fruit Tart....and let's name it after the sweet lady I got the recipe from...Susie.  Susie's Sugar Cookie Fruit Tart...I think that sounds so much better!  (excuse me while I go and change the name!)

I first tasted this dessert at my friend Kelly's house.  Her mother-in-law had made it.  It was so delicious, and I asked her for the recipe.  She was very kind to share it with me.  She passed away a few years ago, but I always think of her when I make this dish, so it's like a part of her still lives in my heart.  I feel like that with several dishes that I make.  I have my Sock It To Me Cake that  reminds me of my grandmother who passed when I was 10 years old and my Aunt Telle. Both of those amazing ladies were a big part of my younger years and they gave me many good memories of that time in my life.  My favorite Potato Salad reminds me of my sweet friend, Dot, who left us on Thanksgiving Day last year. Her laugh and how she made you feel were the things that made her so special. The recipe for Cream of Potato-Broccoli soup reminds me of Glen, who was a neighbor and like a grandfather to my son Christopher.  He actually passed away at the ballpark while he was attending his grandchildren's ballgame.  So sad, but he left behind a wonderful legacy to all he knew. Those are just a few recipes, and I have many like that. I will blog them soon because I have been surrounded by wonderful cooks and bakers who have left a little piece of them behind in the recipes they have shared with me.

I want you to know that it is perfectly fine to use store bought, refrigerated cookie dough.  You may have to let it warm a little bit to be able to press it down in the pan, but it will be delicious and a time saver!

Because this recipe has fresh fruit, it should be assembled the day you are planning on serving it. However, the cookie crust can be made a day or two in advance.  I tossed around ideas of what shape and/or size to make.  I thought it would be really cute to make large individual cookies, but I was short on time and decorating each cookie was a little more time consuming.  I tossed around the idea of a round pizza baking stone, a round cake pan, and finally decided upon a 15 X 10 rectangular jelly roll pan.  Before you put the sugar cookie dough in the pan, spray it with Baker's Joy and dust it with a little granulated sugar, then gently press the dough to the outer edges.  It will feel very thin but it will rise in the oven and not be overly thick, which is how you want it to be. 

When it comes to fruit, you can use any fruit you like.  It's best to use fruit that you can slice through such as blueberries, raspberries and not crispier ones like apples or cantaloupe.  Also, you need the canned fruit for their juice(I used pineapple and mandarin oranges).  Make sure they are well drained and save the juice for the drizzle.  You do not want the juices to sit on top of the cream cheese or the cookie crust and make it soggy.  The original recipe even called for Kiwi fruit, which are really good and pretty on this,  but there weren't any that looked good at my store where I shop.

Oh and I doubled the cream cheese mixture...because, in my little world, you can never have enough cream cheese mixed with pure sugar :

I let my daughter do her own creating and decorating!  (Well I might have made a few suggestions...ha!)  Looks so pretty!


SUSIE'S SUGAR COOKIE FRUIT TART (formerly and affectionately known as Fruit Pizza)

1/2 cup Salted Butter, room temperature
3/4 cup Granulated Sugar
1/4 teaspoon salt
1egg, room temperature (I place an egg in hot water to bring it to room temp)
1 teaspoon Cream of Tartar
1-1/2 cups All Purpose Flour
(1) 8 ounce package Cream Cheese
1/2 cup of Sugar
1 teaspoon Vanilla
1 pint Blueberries
1 pint Raspberries
1 quart Strawberries
3-4 Bananas
(1) 16-ounce can Mandarin Oranges (save the juice)
(1) 8-ounce can Pineapple Tidbits (save the juice)
(4) Kiwi Fruit can be substituted in place of any of the berries or bananas
2 tablespoons Cornstarch
1-2 tablespoons Granulated Sugar

Preheat oven to 350 Degrees.

In a medium bowl, cream the butter and sugar until fluffy.  Add the salt and the egg and beat until well incorporated.  Sprinkle the cream of tartar over the mixture and then add half of the flour.  Mix until it is well incorporated and then add the remaining flour. 

Grease your baking pan or pizza pan and sprinkle with enough sugar to cover.  Shake off excess sugar.

Place cookie dough on pan and using your fingers, press until the cookie dough covers the pan from end to end, corner to corner.

Place in a 350 degree oven for 9-11 minutes.  I watch this very carefully.  I take it out when the corners and edges are golden brown.


Let it cool.

In a medium bowl, blend the cream cheese, sugar and vanilla until smooth.

Spread on top of the sugar cookie bottom.  I leave just a little rim around the edge without frosting.


Slice your fruit and use a circular design for a round pan or really any design you would like.  This is the fun part....be creative! 


Combine the pineapple and mandarin orange juices with the 2 tablespoons cornstarch in a small microwave safe bowl.   Microwave on high for 3 minutes, stopping to stir after 1 minute and then each one minute after.  Spoon on top of fruit to seal.


ENJOY!!