Saturday, March 23, 2013

NEW ORLEANS STYLE BEIGNETS


I always cook a dinner and dessert for my kids for their birthdays.  This year, my daughter Holly was 8 months pregnant with my little grandson on her birthday and was craving donuts!  Now, I have never made donuts and I just don't think mine would have compared with Southern Maid or Happy Donuts, so I was not wanting to attempt to make them.  My son was in from Austin and he suggested Beignets which I have never made either! Even though I was not 100% convinced that they would turn out like something even remotely like a beignet...I was definitely up for the challenge.

I looked on the internet for different recipes and I decided on this particular one because it had so many great reviews.  It comes from a weblog called Nola Cuisine.  I want to try more of their recipes because this one was very well explained and since it was so good, I am betting that the others will be good, as well.

I did not take pictures until the end...sorry!  But, it was a very busy day and I did not know how they were going to turn out so I didn't want to waste time taking pictures.  I really wish I would've taken pictures of my son, Christopher, helping me cook these.  He is a great cook and he is enrolled in Le Cordon Bleu in Austin.  I really enjoyed spending time with him in the kitchen and he is such a big help!  I will definitely be making these again so when I do, I will add more pictures!

If you follow the directions exactly, you will end up with some amazing tasting little bundles of heaven!  They are absolutely divine!

Here is the recipe...and Happy Birthday Holly!!


NEW ORLEANS STYLE BEIGNETS

1 Envelope Active Dry Yeast
3/4 Cup Water (110 degrees F)
1/4 Cup Granulated Sugar
1/2 Teaspoon Salt
1 Beaten Egg
1/2 Cup Evaporated Milk
3-1/2 to 3-3/4 Cups All Purpose Flour
1/8 Cup Shortening
Vegetable Oil for Frying
Powdered Sugar in a shaker or sifter

Combine the Yeast, Water, and Sugar in the work bowl of a stand mixer fitted with a dough hook. You could also make this in a food processor, or the old fashioned way, by hand.  Let this sit until frothy, about 5 minutes, then add the Salt, Egg, and Evaporated Milk. Mix on low speed, then add half of the flour until it starts to come together, then add the shortening.  When the shortening is incorporated, start adding the remaining flour, a little at a time until most of it is incorporated.  At this time, I always turn the dough onto a floured bench to finish by hand, just like when I make bread; it's a touch thing.  Place the dough into a large oiled bowl, loosely cover and let rise.  The person writing this made theirs the night before and let it rise overnight in the refrigerator.  I placed a pan of hot water on the bottom rack of my oven.  Then I put the covered bowl with the dough in it above the pan of water and let it rise for approximately 2 hours.  Either way I am sure is fine but I cannot speak for the refrigerator method since I have not tried it.

After the dough has doubled in bulk, punch it down and turn it onto a floured surface and roll out into a rectangle that is about 1/2" thick.  With a very sharp knife working at a diagonal to the rectangle, cut into 2" wide strips.  Now cut into diamond shapes by making diagonal cuts in the opposite direction.  Place the Beignets on a floured baking sheet to let rise about 40 minutes in a warm place.  (I was actually in a hurry so I skipped this step and they turned out fine but next time I will let it rise the second time because they might be even more light and fluffy).

When the Beignets have risen, heat 2-3 inches of vegetable oil in a large saucepan to 350-360 degrees.   Place a few beignets into the hot oil, being careful not to smash or deflate them.  When they are golden brown, flip them over until golden brown on the other side.  (They go pretty quickly so start checking them right after they go into the oil). 


Remove to paper towel lined plates to drain.  Serve hot and sprinkle with plenty of powdered sugar (because the dough doesn't contain much sugar, you will want a lot).

Makes approximately 2 dozen.

 
ENJOY!
 

Wednesday, March 20, 2013

LEMON CHICKEN


Today it is officially SPRING!!! 
 
This is my favorite time of year.  I love seeing all the flowers and trees bloom out.  The air is cool (for a while...this is southeast Texas, so it is short-lived), and a little breezy.  The birds seem to be chirping a little happier.  It is truly God's Perfection! 
 
 This is also just about the time of year that I am ready for something other than soup, gumbo, and stews.  I am ready for something lighter and fresher.  I love the combination of lemon with chicken so I started looking for a good recipe.  I follow the blog Annie's Eats which is where I got this recipe.  I, as usual, did a little tweaking but I basically followed her recipe and it was superb, easy and is definitely one I will be using a lot. 

At the end of the cooking process, I decided to use the drippings to make a gravy.  It was out of this world delicious.  You could serve the sauce over the chicken, mashed potatoes or rice...just a little added bonus!

This recipe called for only skin-on thighs or drumsticks but there are a few in my family who prefer only white, breast meat so I threw a couple of those in there, as well.  I personally love the thighs.  They are particularly good in this recipe because they are moist and juicy...gosh, my mouth is watering! I think this would be good on the grill too!  The smokiness from the grill would just enhance the flavors of this dish!   I think I will make this again this weekend...maybe on the grill now that the weather is nice! 

HAPPY SPRING Y'ALL!!

LEMON CHICKEN

2 tablespoons Lemon Zest
1/3 cup Lemon Juice, freshly squeezed (substitute lemon juice does not have a place here)
2 cloves Garlic, crushed
1/3 cup Olive Oil, delicate taste
2 teaspoon fresh Thyme leaves,
1 teaspoon fresh Rosemary leaves, finely minced
1 teaspoon salt
1 teaspoon pepper
2-4 pounds of Chicken Thighs or Drumsticks, bone-in, skin-on
2-3 tablespoons Melted Butter
Thinly Sliced Lemons for Garnish

PREHEAT OVEN TO 425 DEGREES

Combine the lemon zest, lemon juice, garlic, thyme, rosemary, oil, salt and pepper in a large zipper-lock plastic bag.

If you do not have one of these little zesters, I highly suggest you buy one.  I use it not only for zesting but for grating parmesan cheese, as well.  Such a handy little gadget!

This little gadget makes juicing fresh lemons a snap

Mince the garlic...this garlic press makes things so much easier

Strip leaves from thyme sprig

Strip rosemary leaves by running your fingers the opposite way the rosemary is pointing.

Mince the Rosemary

Add the Rosemary to the other ingredients

Add 1/3 cup of oil


Shake to blend and add chicken.
 
 
Press out excess air, coat chicken, and place in refrigerator and let marinate for at least 2 hours.


Place chicken pieces in a large pan and reserve the marinade. 
 
 
Brush with butter and place, uncovered, in the 425 degree oven for 50-55 minutes.
 
After about 25 minutes, pour the rest of the marinade over the chicken and place back in the oven until skins are crispy and well-browned.


Once fully baked, cover loosely with foil and let rest 10 minutes before serving.  Transfer to a serving platter. 
 
 
Garnish with lemon slices and serve!
SAUCE:


 Pour liquid from pan or dish into a saucepot.
 
 
If you feel like there is not enough liquid, you can add some Campbell's Chicken Broth.


In a measuring cup or something with a pour spout, place approximately 1/4 cup of cornstarch and enough warm water to make a liquid similar to heavy whipping cream.  Pour slowly into pot, stirring constantly until thickened.
 
Remove from heat.
 
Serve over chicken, mashed potatoes or rice.


ENJOY!


Monday, March 18, 2013

MACARONI AND CHEESE W/ SPINACH


This isn't really a new recipe but just a adaptation of a favorite! 

Last night, I made Gold Buckle Brisket with my recipe for Macaroni and Cheese.  Only I decided to add fresh, green leafy spinach to it.  Now, of course, when I said I was going to do this I saw faces drop!  So, I decided to add the spinach to only half of the macaroni and cheese dish.


I poured half of the macaroni and cheese into the dish and then I stirred a handful of spinach leaves into the remaining half  I poured it into the dish, covered it with the remaining cheese and voila, we added some iron and vitamins and the taste was negligible. 

It was YUMMY!!!

This would be great for kids, if you can get them past the "green stuff"! 


Just thought I would share this little "new idea" with y'all!  It's always a good thing when you can take a favorite recipe to another level!

ENJOY!

GOLD BUCKLE BRISKET


My sister-in-law found this brisket sauce and I am so glad she did because nothing could be easier.   It has the best flavor....people will think you have slaved in the kitchen for hours.  And, it is Gluten-Free.

I found it at Market Basket, which is a locally owned grocery store.  However, if you will click on this link, Allegro Fine Foods in Paris, Tennessee, it will list the stores that carry this sauce as well as give you the option of purchasing it straight from them....I am telling you it is sooooo worth it!!!!

You literally do nothing but pour it over your brisket, cover it, pop it in the oven, and bake it for the time designated for the size brisket you have.  Allow plenty of time because slow and low is the key.  I had two-3lb. trimmed briskets and I cooked them in a 300 degree oven for 4 hours.  The finished product was a tender, moist brisket, that was full of flavor. 

Side Note:  I am thinking that this could be made in the crock pot.  I have never done this but I would probably cut the brisket in large pieces to fit into a crock pot.  Pour the marinade over and cook on high for 8 hours.  Since I have never done this, this is just a guesstimate on time.  If you give it a whirl, I would do it when you are at home all day to check on how it is progressing, cooking-wise.  And...please share with me if you do decide to use the crock pot...I would love to hear how it turns out!

I love to cook but I hate to clean up the kitchen so, I will choose any shortcuts I can find.  I don't see the point in using a pan that I will have to wash just to bake this brisket.  I prefer to bake it in a disposable, aluminum pan and then serve it in a pretty dish.  The point is that my clean up time in the kitchen was shortened and that gives me more time to hold my new little grandson, Alexander!!


GOLD BUCKLE BRISKET
 
Alrighty, here are the step-by-step photos. Hope you try this soon....I promise you will be impressed and hooked!!


These are two, approximately three pound trimmed briskets.


Pour recommended amount of sauce over brisket. 


Be sure to shake up the marinade, all the good seasonings settle on the bottom.


Evenly distribute the seasonings.

Pop in 300 degree oven for recommended amount of time.


Be sure and baste every hour....it keeps the brisket moist.
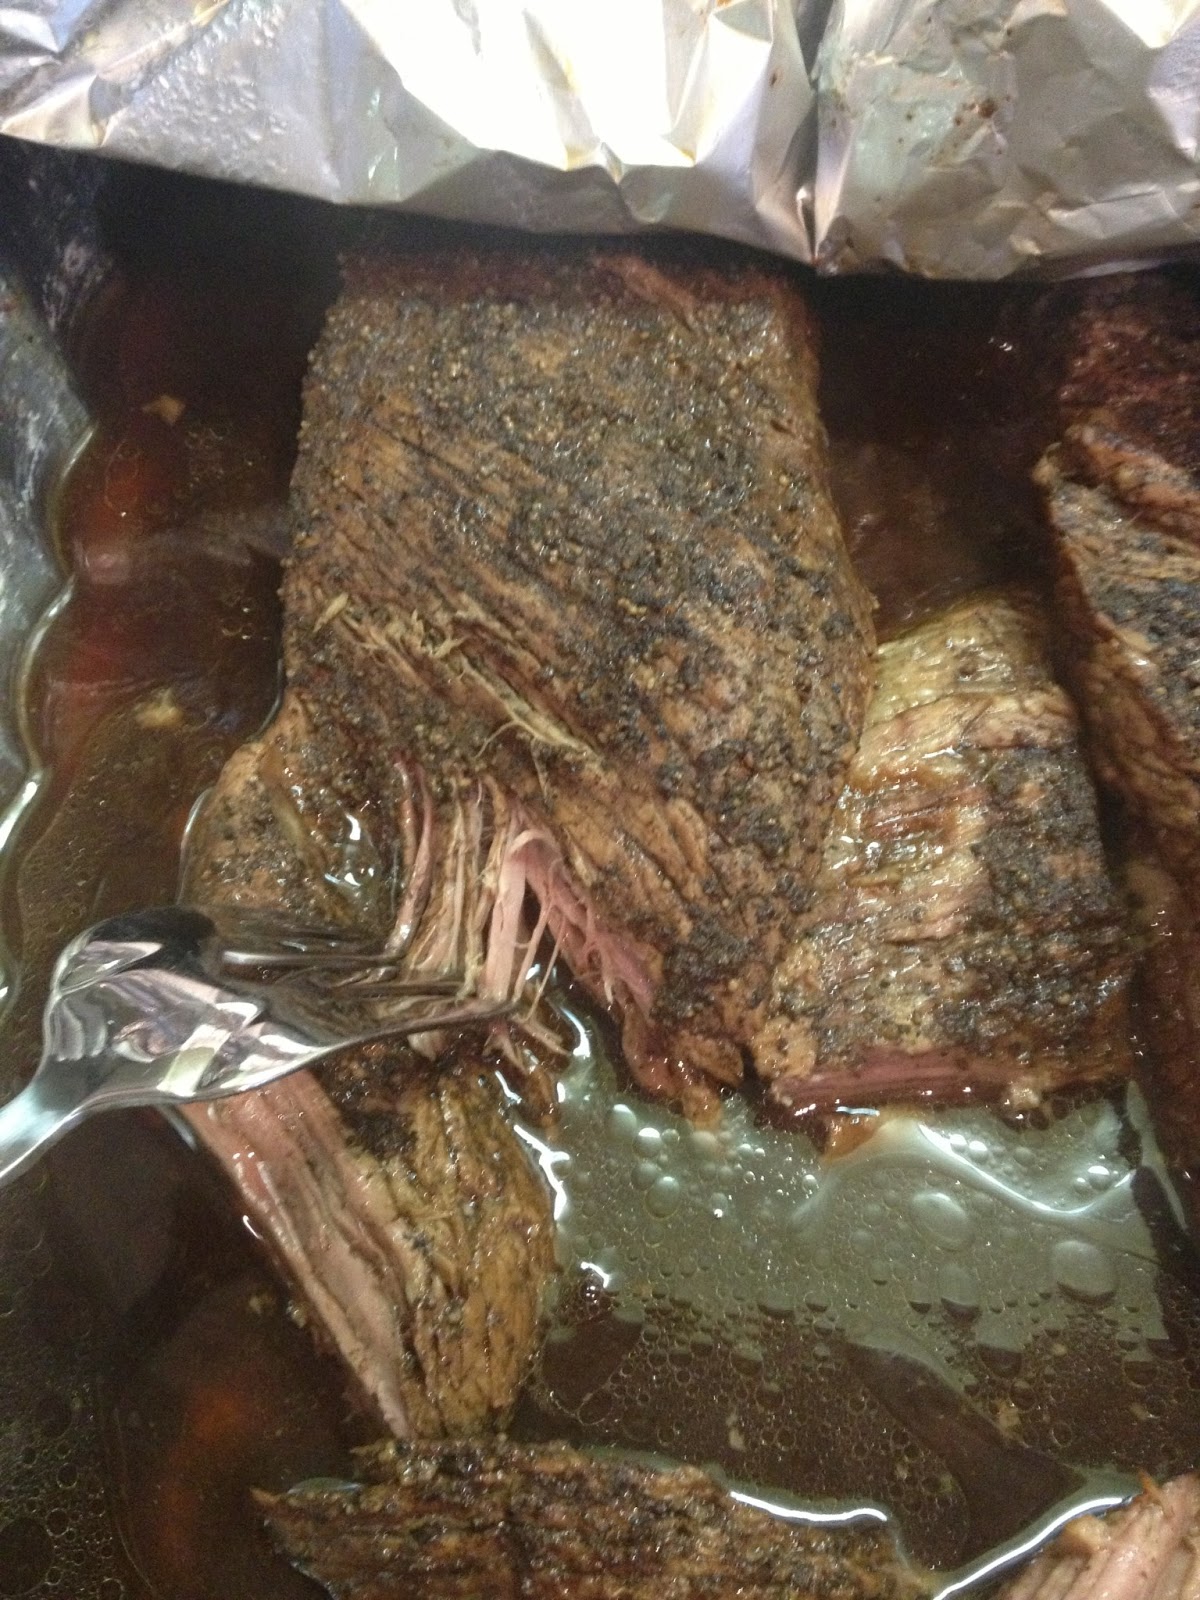
Finished Brisket!


I served it with my recipe for Macaroni and Cheese (I added fresh spinach leaves to half of the mac n cheese...couldn't really taste them but added some extra iron and vitamins), Garlic Green Beans (which I need to blog), and Boston Market Cornbread


ENJOY!

Sunday, March 17, 2013

Fabulous Shower Punch


Well, it has definitely been awhile since I blogged but....with very good reason. 
 
Look what I've got......my first little grandbaby!
 
 
 Mr. Alexander Gray Walker

He is just the love of my life!  I now know what people mean when they say being a grandparent is the most wonderful thing.  I go to sleep thinking of him and I wake up thinking of him.  He is truly a precious gift from Heaven.

Hopefully, now I can get back on track and focus!!!!  I need to blog all of the recipes I have been building up. 

I thought that posting this great shower punch was very appropriate considering it was the punch that was served at my daughter's Baby Shower. 


Also, this is just about the time showers begin for those June weddings.  It is my absolute favorite punch.  I am so glad we only have it at that time because I think I could literally drink the entire bowl by myself!  It is divine!!

It is so easy and you can make it weeks in advance. One of the best things is that if it is spilled, it does not stain.  I don't think I have heard of anyone who does not like this particular punch because it is so fresh and full of pleasing flavors.  Hope you get a chance to make it...you won't be disappointed!

BANANA SLUSH PUNCH

3 cups Water
2 cups Sugar
3 ripe Bananas
1 (46 Ounce) Can Pineapple Juice
1-1/2 cups Orange Juice
1/4 cup Lemon Juice, freshly squeezed is best
4 quarts Ginger Ale


Mix small amount of pineapple juice in blender with bananas until smooth.


Add the rest of the juices and blend until smooth.


Bring the water and sugar to a boil in a saucepan.  Cool.  Add this to the juice mixture.


Freeze in two 13 X 9 pans OR 2 large size Ziploc Freezer bags.


Freeze in freezer at least 2 days before you need it.  I actually doubled this recipe which is the reason for four freezer bags.

Set pans out or bags out to thaw 30-45 minutes before ready to serve.


Cut frozen juice into squares or remove mixture from baggies and place into punch bowl.  Pour Ginger Ale on top of frozen juice.  Divide 1/2 batch frozen juice per 2 quarts Ginger Ale.

This makes two bowls of punch. 


ENJOY!


Monday, January 14, 2013

CINNAMON ROLL CAKE

I am so sorry I have not shared any recipes on my blog lately.  So, to make up for it I knew I needed to share something reallllly special.
 
Well, this cake it pretty close to perfect!
 
My kitchen smells amazing when it is cooking and you literally can eat it while it is still warm.  In fact, the next day I will pop a piece in the microwave for a few seconds and it tastes just like it came out of the oven. 
 
I made it last year for bunco to announce Chelcie Concienne Barnett's and Ashley Concienne's pregnancies.  We called it "Bun In The Oven" cake.   Definitely bad for my "buns" though!  He He!
 
It is an easy cake to make but make sure you read through the instructions first. 
 
CINNAMON ROLL CAKE
 
 
CAKE:
3 cups flour
1/4 teaspoon salt
1 cup sugar
4 teaspoons baking powder
1-1/2 cup milk
2 eggs
2 teaspoon vanilla
1/2 cup butter, melted
 
Mix everything for 2 minutes except for the butter.  Slowly stir in butter and pour into a greased 9X13 pan. 
 
TOPPING:
1 cup butter, softened
1 cup brown sugar
2 tablespoon flour
1 tablespoon cinnamon
 
 
Mix all the topping ingredients together until well combined.  Drop evenly over the batter and swirl with a knife.
 
Bake at 350 degrees for 28-32 minutes


GLAZE:
2 cups powdered sugar
5 tablespoon milk
1 teaspoon vanilla


Drizzle glaze over cake while it is still warm.