Thursday, April 2, 2020

LOADED VEGGIE MEATLOAF


It's been a while since I have added a new recipe.  I found out earlier this year that I had high cholesterol and I had to make some dietary changes.  I decided to go hard core and try the plant based lifestyle.  It was an adjustment but I have to say that I have had so many benefits that I will probably continue eating this way 75 percent of the time.  The one thing that I have had some trouble balancing is the amount of iron that my body requires.  That is the main reason I decided to make this meatloaf tonight.  I felt like ground sirloin was lean and it would be easy for my body to digest but. I wanted to add as many vegetables as I could to make it a more nutritious choice.  I had no idea how it would turn out.  I went loosely based on an old meatloaf recipe I had.  Then, I added any vegetable I could find in the fridge, crossed my fingers and hoped for the best! Haha!  It turned out absolutely amazing! The sauced on top take it to the next level! One thing to note is that the measurements of each ingredient are to the best of my knowledge...I wasn't thinking of blogging this recipe (the awful pictures are verification of that.)  It was more of an experiment.  So, next time I make it, I will definitely measure everything out (and take more appealing photos) but, for now, that is why I have a measurement range on some of the ingredients.  Hope you try it and like it too!

LOADED VEGGIE MEATLOAF

1-1/2 lb. Ground Sirloin 
1/2 small Onion, diced fine
1 small Jalapeno, diced fine
8-10 small snack size carrots, diced fine
2 Celery Stalks, diced fine
1/2 small Red Bell Pepper, diced fine
3/4 cup Cauliflower, diced fine
1/2 Yellow Squash, diced fine
2 eggs
1/2 - 3/4 cup Crackers, crushed 
2 Teaspoons Steak Seasoning
1/4 - 1/2 teaspoon Crushed Red Pepper (optional)
1/4 cup Mustard
1/2 cup Dark Brown Sugar
1 cup Crushed Tomatoes
1 teaspoon Garlic Salt
1/2 teaspoon Pepper

Preheat Oven to 400 Degrees

Combine the first 12 ingredients.  Shape into a loaf and place on a foil and parchment lined cookie sheet.  

Combine the mustard and brown sugar and spread evenly on top of the loaf.

Combine the tomatoes, garlic salt, and pepper.  Spoon evenly over the mustard and brown sugar.

Bake, uncovered, in 400 Degree oven, for 45 minutes to 1 hour depending on the size of the loaf. (Internal temperature should be 160 Degrees)

Serve immediately.

Note:  I also made a few meatballs out of the meat mixture because the meatloaf was too much for just me and my husband.


Saturday, November 25, 2017

SALTED CARAMEL APPLE PIE BARS

Shortbread Crust

1/2 Cup of Unsalted Butter, melted
1/4 Cup of Granulated Sugar
1 Teaspoon Vanilla
1/4 Teaspoon Salt
1 Cup Flour

Preheat oven to 300 Degrees.
Line the bottom and sides of a 8 X 8 baking pan with parchment paper leaving enough overhang on all sides and set aside.

In a medium bowl, stir the butter, sugar, vanilla, and salt together.  Add the flour and stir until everything is combined well.  Press evenly into the prepared baking pan. Bake for 15 minutes.

FILLING:

4 Large Jazz Apples, finely chopped
1 Cup Sugar
2 Teaspoons Apple Pie Filling
1/4 Cup Flour

In a medium saucepan, combine the apples, sugar and pie filling cooking until the apples start to soften, about 10 minutes.  Add the flour, stirring to combine and cook for another 2- 3 minutes.  Mixture should thicken slightly.


STREUSEL:

1/2 Cup Old-Fashioned Oats (I even used Quick Cook Oats)
1/3 Cup Dark Brown Sugar
1/4 Teaspoon Cinnamon
1/4 Cup Flour
1/4 Cup Unsalted Butter (Cold and Cubed)

Whisk together the oats, brown sugar, cinnamon and flour.  Add the butter and work it together with a couple of forks, a pastry cutter, or use your hands like I do, until the mixture resembles coarse crumbs.

SALTED CARAMEL SAUCE;

1 Cup of Sugar
6 Tablespoons Salted Butter, room temperature and cut up into 6 slices
1/2 cup Heavy Cream
1 teaspoon Salt

1. Heat granulated sugar in a medium saucepan over medium heat stirring constantly with a heat resistant spatula or wooden spoon.
2.  Sugar will form clumps and eventually melt into a thick, brown, amber colored liquid as you continue to stir.  Be careful not to burn.
3.  Once sugar in completely melted, add in the butter.  Be careful with this step because the butter will bubble up rapidly when it is added.
4.  Whisk the butter into the sugar until it is completely melted and blended into the sugar...about 2-3 minutes.
5.  Very slowly drizzle in the cream while stirring.  Since the heavy cream is colder than the caramel, the mixture will rapidly bubble and/or splatter when added.
6.  Allow mixture to boil for 1 minute.  It will rise in the saucepan as it boils.
7.  Remove from heat and stir in 1 teaspoon salt.  Allow to cool before using.

*You can make this caramel sauce in advance.  Store covered tightly in the refrigerator for up to 2 weeks.  If you are traveling or gifting this recipe, it is okay for a day at room temperature.

1. Make your salted caramel sauce.
2.  Bake your shortbread crust
3.  Cook the apples
4.  Mix up the streusel
5.  Remove the shortbread crust from the oven and turn up the heat to 350 Degrees.
6.  Add the apples to the crust
7.  Evenly distribute the streusel on top of the apple mixture
8.  Bake in 350 Degree oven for 30-35 minutes.
9.  Cool for 2 hours or overnight would be better.
10.  Cut into 12 or 16 squares and drizzle salted caramel sauce over each square

These bars can be enjoyed warm, room temperature, or even cold...you decide.
You can also make these ahead and freeze, without the caramel sauce for up to 3 months.
Then thaw overnight in the refrigerator before serving and drizzling with caramel sauce.

Sunday, February 12, 2017

MINI PUMPKIN MUFFINS WITH CREAM CHEESE FROSTING


My little granddaughter, Hope, loves her pumpkin bread!  She turned one year old last October and she had a "Our Little Pumpkin Is Turning One" themed birthday party.  I made these little mini pumpkin muffins because, I mean how perfect....she loves pumpkin muffins and she is a little "mini" herself.  She lovvvved them!  I actually substituted sweet potato this past week for the pumpkin and she loved them just as much.
My daughter Holly and her sweet baby, Hope.

I found this recipe for pumpkin muffins while going through some old recipes of my Mom's. I think what caught my eye was first...that it won 2nd place in a contest and the second thing that caught my eye was all of the different spices!  Yummm!  It almost seemed like too many spices but after tasting it, it is apparent that they all work together perfectly and make each bite super duper flavorful.  Definitely deserving of an award in my books.  The original recipe called for 1 cup of vegetable oil and 3 cups of sugar.  I felt like 3 cups of sugar was just too much so I backed it down to 2 cups.  I cannot imagine having another cup in this recipe because 2 is just right....sweet but not too sweet.  Then I read that you could use coconut oil in place of the vegetable oil in recipes.  I knew that would be much healthier so I replaced half of the oil with the coconut oil.  I may use only coconut oil next time.  It was so moist.

Fast forward to this past week, I was keeping both Hope and her brother Alex for a few days.  I baked a few sweet potatoes for dinner one night and the only person who ate any was me....so I had like 3 potatoes left.  I hated to just stick them in the fridge because in my house, that is where good food goes to die.  Wahhh!!! I hate to say that but you have to be able to admit you have a problem before you can fix it...right?  Okay getting back on the subject.  I had three sweet potatoes left.  I thought of my pumpkin muffin recipe and the two worlds collided....sweet potato muffins! I didn't even put any frosting on them and Hope and Alex both loved them.  So much so that I had to cut them off.  They wanted them for snacks, breakfast, dessert...pretty much all day.  They are low in sugar but not sugar free guys...gotta pace yourselves. LoL!

Hope you like them like Hope and Alex do!

MINI PUMPKIN MUFFINS WITH CREAM CHEESE FROSTING

2 cups Pumpkin Puree 
 4 eggs
1/2 cup Coconut Oil, (melted and cooled)
1/2 cup Canola Oil
2/3 cup Milk
2 cups of Sugar
3-1/2 cups Flour
2 teaspoons Baking Soda
1/2 teaspoon Salt
1 teaspoon Ground Nutmeg
1 teaspoon Ground Cloves
1 teaspoon Ground Cinnamon
1 teaspoon Ground Ginger
1 teaspoon Ground Allspice

Preheat 350 Degrees

In a large bowl, mix the first 5 ingredients until well blended.

In a separate bowl, combine the rest of the ingredients.

Add 1 cup of the dry ingredients at a time, to the wet, continuing until everything is blended together.

Fill mini muffin cups to just above half full.

Bake for 13-15 minutes or until center springs back when touched.

Makes approximately 8 dozen miniature muffins.

CREAM CHEESE FROSTING:

4 ounces Cream Cheese
4 ounces Butter
2 cups Powdered Sugar
1 teaspoon Vanilla

Beat the cream cheese and the butter together in a large mixing bowl.
Add the powdered sugar slowly to the cream cheese/butter mixture on low speed of mixer.
Add the Vanilla and mix until well blended.

Place the frosting in a gallon size ziploc bag.  

Snip a very small piece off of one corner of the bag.

Squeeze the icing onto the cooled muffins in a circular design.

ENJOY!


Wednesday, January 25, 2017

BASIL PESTO


Can we all just agree that pesto is magical?

It is like the most perfect combination of ingredients.  Whoever, created it first needs a medal...seriously!  

I love that it is fresh and can be used in so many ways.  Tonight, I had a recipe that called for pre-made pesto, but it is so super easy to make and quick that I didn't even consider not making my own.  If you have a food processor, you can have it made in 5 minutes...or less.  

The good thing is that you can put pesto on pretty much anything and make it taste ahhh-mazing!  Try it on those vegetables you can't get your family to eat.  Put it on toasted baguette slices instead of garlic butter or toss some pesto with your favorite pasta for a delicious entree.  And a little goes a long way, so I still have some in my fridge from tonight's dinner.   Think I'll toss some over pasta tomorrow night's dinner.

BASIL PESTO

2 cups fresh Basil
2 Garlic cloves, minced
1/2 cup Parmesan Cheese, grated
1/4 cup Pine Nuts
2/3 cup Olive Oil
Salt

Place all ingredients into a food processor and blend until smooth...about 30 seconds to 1 minute.

ENJOY!


Thursday, January 19, 2017

CASSEROLE SPAGHETTI


I have been making this recipe for Casserole Spaghetti ever since my kids were little.  My friend, Kelly Galloway, first made this and it has been one of my favorites ever since.

For some reason, I have not made this since my grandson, Alexander, was born.  But today, I was craving something cheesy and something with pasta and this popped into my head.  Such an easy recipe to make...have you noticed a pattern with the "easy" recipes?  I don't know if I would have ever tried this recipe if Kelly had not made it first because of the cream of mushroom soup, chili powder, and olives.  Those three items seem strange to add to spaghetti but I can attest that they are delightful little additions.  Now tonight, I did not put olives in it just because I wasn't sure if my grandkids would eat it if I added them.   What was funny was that little baby Hope, who is 16 months old, ate what was in her plate and then had seconds...along with her garlic bread because this girl is just like her Nannie...we like our bread!  Alex loved it too.  So, I got a two-thumbs-up on this recipe from the littles!

A couple of things you should know.  I used thin spaghetti and I cooked it al dente.  I knew that the spaghetti would cook more in the oven and I cannot stand mushy pasta of any sort.  I would rather under cooked spaghetti than overcooked.  Actually, I just want it cooked perfectly.  Sometimes that works out and sometimes not.  Today, we got it right!  Woo-Hoo!  Also, if you do not want to cook the meat sauce for 2 hours then you do not have to.  I have done it both ways and honestly, I cannot tell the difference.  

I made a salad and some lemon vinaigrette to drizzle over it and garlic bread to serve with the spaghetti.  It was perfect for a quick meal.  Oh and I had leftovers....that is a plus. 


CASSEROLE SPAGHETTI

1-1/2 pounds Ground Round
1 Bell Pepper, chopped
1 large Onion, chopped
1/2 cup Celery, chopped
2 cloves Garlic, minced
1 (10-3/4 ounce) can Cream of Mushroom Soup
1/2 can Water
1 (14 ounce) can Petite Diced Tomatoes
2 Tablespoons Chili Powder
Salt and Pepper to taste
Garlic Powder
1 (12 ounce) package of Spaghetti Noodles,cooked al dente
8 ounces Sharp Cheddar Cheese, cut in chunks
1 (4 ounce) jar Olives
2 cups Grated Cheddar Cheese

Brown ground round and add garlic powder and salt and pepper to taste.   Add next 9 ingredients and simmer for 2 hours.  Combine meat sauce, cheese chunks, and olives in 3 quart or deep 9 X 13 ceramic baking dish.  Sprinkle grated cheeseon top.  Bake in 325 degree oven for 15 to 20 minutes or until bubbly.

ENJOY!

CLICK HERE FOR PRINTABLE RECIPE


Monday, January 16, 2017

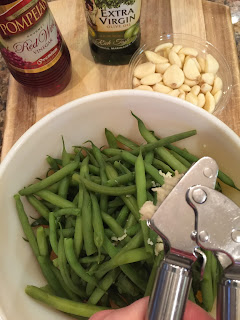
RED WINE VINEGAR AND GARLIC GREEN BEANS


My friend, Kelly, makes these green beans the best!

I got the recipe from her.  Before that, green beans were relegated in my house to a green bean casserole.  I like flavor and green beans never seemed to have any....until this recipe!

I literally could eat these yummy little beans all by themselves....cold on a salad....or hot with a meal.  For some reason, this sounds like the beginning of a Dr. Suess book to me!  Okay, anyway, my daughter is just as obsessed with these as I am.  I am sitting here thinking that a couple of shakes of red pepper flakes would take this up a notch.  Why have I not thought of that before?  Next time!

Super easy to make and super flavorful....enjoy!


RED WINE VINEGAR AND GARLIC GREEN BEANS

2 lbs. fresh whole Green Beans
5 cloves Garlic, minced
Little less than 1/2 cup Red Wine Vinegar (You might want to start with a 1/4 cup and then add more     to your liking and taste)
Little less than 1/2 cup (I use less because its my preference) Olive Oil (I use a good, extra virgin like Bertolli) 
Salt to taste.


Bring salted water to boil.


Add beans and cook for 5-6 minutes.  I like my green beans al dente.  I don't like them too soft or to crunchy, just somewhere in the middle.

Drain and submerge in cold, ice water to stop the cooking process.  Or stop the cooking just a little early and then skip this step. 


If you have chosen to submerge in cold water, then drain and place in a large, glass bowl.  Mince the garlic and add to the beans.  Shake vinegar over beans. Toss.  Drizzle oil over beans and add salt to your liking and toss again.

When you are ready to serve, reheat in microwave for approximately one minute. 

Stir to coat beans.

ENJOY!

Monday, January 2, 2017

DOROTHY'S MARINATED VEGETABLE SALAD


My Mom, Dorothy, used to make this salad every Thanksgiving.  She loved it and I think everyone else did too....except me.  

I just never did like this dish.  I guess it might have been because it had green peas and canned green beans. Those two items are two of my least favorite things in the food world, right behind oysters and vital organs.  So, every year she would ask what she could make to bring over for the Thanksgiving meal and I would say "bring whatever you want."  I knew it was going to be this salad and that was okay, but I was not going to eat any of it.   Then, one Thanksgiving...in a weak moment...I put some on my plate...and then I understood what everyone else had figured out....it was really good!

I think I have already told y'all this, but my Mom has dementia now.  She hasn't been able to make this salad in years and I really miss that now...I really miss the old her...the one who would make this salad every year.  This CHRISTmas I found myself really wanting to eat this salad.  I bought all of the ingredients but somehow never found the time to make it.  Well, I made it today for our One-Day-Late-New-Years-Day-Meal.  My sister-in-law made an Apple Pie and a Peach Pie, my son made his famous Pork Shoulder...it was so delicious.  I made Blackeyed Peas, Sauteed Cabbage, Cornbread and my beautiful Mom's Marinated Vegetable Salad.   Maybe, it was a good thing to wait because I think it was a good way to start the New Year remembering the good things...no matter how seemingly small.

HAPPY NEW YEAR TO YOU ALL!


DOROTHY'S MARINATED VEGETABLE SALAD

(1) 14.5 ounce can French Cut Green Beans, drained
(1) 11 ounce can White Shoepeg Corn, drained
(1) 8.5 ounce can Green Peas, drained
(1) 2 ounce jar chopped Pimentos, drained
2 Bunches Green Onions, chopped
1 cup Celery, chopped
3/4 cup Apple Cider Vinegar
1 cup Sugar
1/2 cup Olive Oil
1 Teaspoon Salt and Pepper


Did you notice that in the picture above I bought the wrong beans?  I didn't notice until I opened them up.  
So I took each bean and sliced it into "french-cut" green beans.  
Yep...every....single...bean! (facepalm)


Combine first 6 ingredients in a medium glass bowl.


In a small saucepot,  bring to boil the vinegar, sugar, olive oil, salt and pepper.


Let cool and pour over ingredients.

Refrigerate overnight.

ENJOY!

Tuesday, December 27, 2016


SPICY PECANS

This recipe is from a good friend of mine, Stephanie DeLord.  She made these scrumptious, little treats to go on a salad she was serving for bunco at her home years ago.  Our bunco group has been playing together for over 20 years and every single woman is a fabulous cook.   I have gotten so many great recipes from them over the years and it has become more like a supper club/bunco group which is just fine with me.

Anyway....getting back to these pecans.  My sister-in-law and I decided to trim our holiday cooking down on CHRISTmas Day so we could enjoy more time with our children and their babies.  Best decision all year long!  She made lasagna, meatballs and pasta for the kids, and a dessert.  I made a salad, garlic bread, and a dessert.  Now, if I am going to only bring a salad with no main course, then that salad is not going to just be greens with tomatoes and cucumbers.  Soooo.....I put the greens in a large bowl.  I cut up grape tomatoes, green peppers, red peppers, shallots, and served kalamata olives, pepperoncini peppers and the spicy pecans in a divided dish that allowed everyone to make their salad to their own liking.  I also made a homemade vinaigrette and bought ranch dressing from Salt Grass Steakhouse (because I think they have the best).   Let me add....the good thing (or maybe the bad thing) about these pecans is that they are so good you can eat them as a snack by themselves.  They are a little sweet and a little spicy.  I personally think you could double the cayenne in this recipe and it would be great.  I actually have a container of them sitting on the kitchen counter but between my son and I, they are disappearing at a rapid rate.

These pecans are really easy to make but you just have to keep an eye on them and be sure to stir them every 10-12 minutes for 40-45 minutes.  You really want the coating on the pecans to dry out/cook evenly so the turning of the pecans is very important.  I set a timer every time I stir so I don't forget.  Ten minutes goes by really fast.  It is also important to keep these pecans in a airtight container so they stay fresh and crispy.

Eat your greens with your spicy pecans and you will be a happy girl or guy!  Enjoy!


SPICY PECANS

2 Large Egg Whites
1-1/2 teaspoons Salt
3/4 cup Sugar
2 teaspoons Worcestershire Sauce
2 tablespoons Hungarian Paprika
1-1/2 teaspoons Cayenne Pepper
4-1/2 Pecan Halves
6 tablespoons Butter (melted)

Preheat Oven to 325 degrees.

Beat egg whites with salt until foamy.

Add sugar, worcestershire sauce, paprika, and cayenne.  

Fold in pecans and melted butter.  

Spread pecans evenly on a baking sheet. 
(I covered my baking sheet in foil for easy cleanup)

Bake 40-45 minutes stirring every 10-12 minutes.

Remove from oven and cool.

Store in an airtight container. 


ENJOY!

Wednesday, November 30, 2016

DEVILED EGGS


My son and I love deviled eggs!

When I first started making them, I didn't have a clue what I was doing.  I was 18 with no recipe and no idea what goes into deviled eggs.

Now, 35 years later, I have made these probably 1,000,000 times (okay...maybe not that many but so very, very close! Haha!)

Weird thing happens every time I make these though...several of them go missing before I can serve them...Christopher!!!  So, I've learned over the years to make extra!

I really need to play around with some different ingredients to add to the eggs....bacon, jalapenos, cilantro, tabasco, sour cream, etc.  I think that any of those ingredients would make these like super-duper good!!

I usually make these by just eyeing the ingredients without measuring.  However, blogging requires me to try to determine ingredient amounts.  The ingredients are approximate so, just remember that you can always add but you cannot take away.  You may want to add a little more of this or that and you can totally do that.  Get creative...have fun...enjoy!

DEVILED EGGS

2 dozen eggs, boiled
6 tbsp. Mayonnaise
2-1/2 tbsp. Dill Relish (I like Dell Dixie)
2 teaspoons Worcestershire Sauce
1-2 teaspoons Mustard
Salt to taste
Ziploc Bag

Place eggs into a large pot with enough cold water to cover and bring to a boil.  Boil for 10 minutes.
Remove the pot from heat and pour off the water.  Let cool.

Peel the eggs and then cut in half lengthwise.  Remove the yolks from the eggs, placing them in a medium mixing bowl.  Place the white part of the egg in a deviled egg tray or a plate.

Using a hand mixer, add all the ingredients and mix well.

If the mixture seems to dry, add more mayo, dill relish, and mustard until you get it to a thick, paste-like consistency.

Open a gallon size ziploc bag and spoon in the yolk mixture and smoosh (how do you like that recipe lingo?) all of the way down to the bottom of the bag.

Cut a small piece of one of the corners off.  

Close the bag and then remove the air...twist the bag one or two rotations holding the bag in the corner of your hand between the thumb and your index finger.

 Squeeze the mixture into each egg half.


Top with your choice of ingredients...pimentos, bacon, paprika, etc.

Cover and refrigerate.

ENJOY!


Monday, November 28, 2016


MEXICAN CHICKEN VEGETABLE SOUP

2 lbs. Boneless Chicken breasts and thighs, sprinkled liberally with TexJoy Steak Seasoning and Garlic Powder.  Bake in 400 degree oven for approximately 30 minutes or until chicken is 165 degrees.
2-3 tbsp. Olive Oil
1 cup chopped green onions
1/2 cup chopped onion
1/2 Large Poblano Pepper, chopped
1/2 Medium Green or Red Bell Pepper
8 Garlic Cloves, chopped
4 Celery Stalks, chopped
10 Baby Carrots, chopped into bite size pieces
1 can Rotel Tomatoes, (I used the one with lime juice and cilantro)
3 quarts Homemade Chicken Stock or Campbell's Chicken Broth (this is an approximate amount.                 You may want to add more broth or water depending on how much liquid you like in your                    soup)
1 small bag frozen Baby Lima Beans
1 small bag frozen Sweet Corn
1 large Yellow Squash, sliced into bite size pieces
6-8 Baby Bella Mushrooms, sliced (can use mushroom of your choice)
1/3 cup Cilantro, minced
2 Dried Red Chiles (optional)
Salt and Pepper
Toppings:  Chopped avocado, shredded cheese, green onions, fresh chopped cilantro

In a large soup pot, add olive oil and first 7 ingredients.  Saute on low to medium heat until onion is transluscent.

Add the Rotel tomatoes and chicken stock.

Chop the chicken and add to the soup, along with the rest of the ingredients.  Cook for another 30 minutes or longer.  Serve with toppings.

ENJOY!


Sunday, August 21, 2016

PIONEER WOMAN'S CURRIED CHICKEN SALAD


Pioneer Woman's Curried Chicken Salad on Parmesan Crisps

I have my favorite chicken salad that I have been making for years.  I posted the recipe on this blog a few years ago.  (click here for recipe)  It is full of wonderful ingredients like grapes and almonds.  I have made that recipe like a million times (I may be exaggerating just a little).  Anyway, I was watching Pioneer Woman the other day and she was testing recipes for her new restaurant...which is now on my bucket list!  She made two different versions of chicken salad...one was like my recipe and one was called Curried Chicken Salad.  She served it to 6 of her friends and family and let them choose which one they like best.  Yep...you guessed it...they chose the curried version hands down.   Well that got my curiosity up and I decided I needed to see what was so great about adding curry to the chicken salad.

First of all, I don't think I have ever had curry in anything I have eaten.  I know, I have lived a sheltered life.  Second of all, I don't even know what curry is!  My son, the chef, explained that there are different kinds of curry with different ingredients with different measurements.  Oh geez Louise...this is getting out of my comfort zone and out of my very small culinary world!  But I am so intrigued by Pioneer Woman's little contest and findings that I keep moving forward.

I chose a curry powder that had tumeric, fenugreek, and coriander as the first three ingredients.  It was by a company called Morton & Bassett.  So, with that obstacle conquered I was ready to start putting ingredients together.

I decided to make both chicken salads...my tried and true recipe and the curried version.  I changed both of them up a little by using baked chicken breasts.  I have always used canned chicken and Pioneer Woman uses an entire roasted chicken.  I sprinkled them liberally with garlic powder and garlic salt.  Since I didn't know anything about curry powder, I didn't want to use a spice that would conflict and I think garlic was definitely the right choice.

The results....the curried chicken salad was full of amazing flavor.  I absolutely loved it.  I feel like I have been living in a culinary bubble and I just popped out of it...yayyyy for me!  It was very creamy from the mayo and yogurt, but it was crunchy too because of the almonds and celery.  It had just the right amount of sweetness from the raisins and sugar but the flavor was boosted with the salt and pepper.  I just love sugar and salt together....example my watermelon with salt sprinkled on or an apple with a little sugar on it...but I divert.  Bottom line....I like my sugar with a little bit of salt.

Conclusion:  I like them both and I cannot choose!  I am definitely keeping my recipe but I definitely going to make the curry chicken salad too.  Why do I have to choose...I don't and that makes my world a little better and a little bigger.

CURRIED CHICKEN SALAD

2-1/2 pounds Chicken Breasts (5 or 6 large)
Garlic Powder and Garlic Salt
3/4 Cup Golden Raisins
1/2 Cup Slivered Almonds
4 Green Onions, chopped
3 Stalks Celery, chopped very small
1/2 Cup Mayonnaise
1/2 Cup Plain Greek Yogurt
1/4 cup Heavy Cream
3 Tablespoons Curry Powder
2 Tablespoons Fresh Cilantro, chopped
1 Tablespoons Brown Sugar
Salt and Freshly Ground Black Pepper

Sprinkle the chicken breasts liberally with garlic powder and garlic salt.
Bake in a 400 degree over until done, approximately 45 minutes depending on size of chicken breasts or until a instant-read temperature probe inserted into the center of the breast reads 165 degrees
Chop into small bite-size pieces and place in a large bowl.
Add raisins, almonds, onions, and celery to the chicken and set aside.

In a small bowl, combine the mayonnaise, yogurt, heavy cream, curry powder, cilantro, brown sugar, and some salt and pepper.  Pour the dressing over the salad ingredients and gently toss to combine. Taste and adjust the seasoning.
Allow to chill for several hours or overnight.

Serve over mixed greens or bread of your choice.  (it is good no matter how you serve it)

Serves 6 people easily

ENJOY!


Monday, August 15, 2016

PIE CRUST

Today was life changing!  I made a homemade pie crust for my first time ever. LoL!

I don't know why I waited because it was literally the easiest thing I did all day.  It was so flaky and so light that I am still a little giddy! I used Pioneer Woman's recipe and it took me less than 10 minutes to make it and then another 15 minutes to let it cool in the freezer.  So, 25 minutes later I have a pie dough that, when baked, beat any bought pie crust I have ever had.  There is seriously no comparison!

Thank you Pioneer Woman...I am high "five-ing" you from my Little Magnolia Kitchen!

HOMEMADE PIE CRUST

3 Cups All Purpose Flour
3/4 Cups Shortening
1-1/2 Sticks (12 tablespoons) Salted Butter (Cold)
1 Egg, Beaten
5 Tablespoons Cold Water
1 Tablespoon White Vinegar
1 Teaspoon Salt

Put the flour in a large bowl.
With a pastry cutter, gradually work the shortening and butter into the flour until it resembles coarse meal, 3 to 4 minutes.
In a small bowl, beat the egg with a fork and pour it into the flour mixture.
Add the cold water, white vinegar, and salt.  Stir gently to combine.
Form the dough into 2 evenly sized balls and place each ball into a gallon food storage bag.
Using a rolling pin, slightly flatten each ball of dough (to about 1/2 inch thick) to make rolling easier later.
Seal the bags and place them in the freezer until you need them. (If you will be using them immediately, it is still a good idea to put them in the freezer for 15-20 minutes to chill)  Note: I did this and then I had to wait for 15 minutes before I could work with the dough.  I am thinking that I might try 5 minutes next time.
When you are ready to use the dough to make a crust, remove from the freezer and allow to thaw for 15 minutes.

ENJOY!


Wednesday, August 3, 2016

SIRLOIN VEGETABLE SOUP


I was in a hurry the other day....like most days...but I still really wanted to eat something homemade.  I also wanted to cook something that my little 3 year old grandson might eat.  So, after wracking my brain, I finally decided to make a soup.

I have never made this soup before.  I actually used Pioneer Woman's Hamburger Soup recipe as a guide because I figured it would be the best.  But, I changed it, of course.  I wanted more depth of flavor so I kept adding garlic, spices, onions, worcestershire, etc.  I did not add anything spicy because of my grandson.  It was a hit.  My husband said it was the best soup he had ever eaten...so he got his picture in the post (don't tell him though, he was just being goofy in this pic).  My grandson didn't eat any of it. Ugh!  But he is 3 so ya just never know! Haha!  He actually ate a peanut butter and jelly sandwich which is always a good choice and if I had a picture of him eating that, I would've posted it because he is just so precious!

This soup was done from start to finish in 45 minutes.  The potatoes take the longest so the smaller they are, the quicker the soup cooks.  Pioneer Woman's recipe called for carrots, but no baby lima beans or corn.  I didn't have any carrots but I had the other ingredients so that is what I used.  This soup is versatile and you can switch out veggies for the ones you like.  You could serve this with rice or tortillas.  And it is so full of flavor!  It is a recipe that I will be making over and over again!


SIRLOIN VEGETABLE SOUP

2-1/2 lbs. Ground Sirloin
Garlic Powder (I use a lot)
Salt and Pepper
4 Green Onions, chopped
1 Medium Onion
3 Stalks Celery, chopped
6 Cloves Garlic, minced
1 Green Bell Pepper, diced
1 Red Bell Pepper, diced
1 Yellow Bell Pepper, diced
4 Red New Potatoes, peeled and chopped
1 regular bag frozen Corn
1 regular bag frozen Baby Lima Beans
3-10 ounce cans Campbell's Beef Broth
2-10 ounce cans Water
2 teaspoons dried Oregano
1 teaspoon Cumin
1 teaspoon Italian Seasoning
Garlic Powder (1-2 tablespoons or more...I don't think there is such a thing as too much garlic)
1 teaspoon Worcestershire Sauce
2-10 ounce cans Mild Rotel Tomatoes and Chiles
1-6 ounce can Tomato Paste
Red Chili Flakes or Cayenne Pepper or Hot Sauce for heat (if desired)

Place the meat in a large Dutch Oven and add green onions, onions, garlic, celery and a lot of garlic powder.  Also, add salt and pepper at this time to the meat.  Cook until the meat in done and then drain the grease.

Return to the stove and add the rest of the ingredients.  Return to a boil, then reduce heat and cook until the potatoes are tender.  Salt to taste.  Top with shredded cheese and/or chopped green onions, if desired.  Serve with cornbread or garlic bread.

ENJOY!


Tuesday, June 9, 2015

BREAKFAST CASSEROLE


This casserole is going down as my new favorite large-crowd breakfast dish!  Actually, this can be halved so it is going down as my new favorite breakfast dish...period!   It is so versatile and you can take it in any flavor direction that you want just by changing your spices.

I wasn't sure how this recipe was going to turn out so I didn't take a lot of pictures.  In fact, I only took two!  So wish I would've taken a picture of the layers of cheesy eggs, on top of sausage, on top of golden fried potatoes.  It was pure divine yumminess.  Not guilt-free, but this isn't something I would eat everyday.  I probably will save this dish for special times such as Christmas morning, brunch with friends, or when I have company!

My son made a dish similar to this while we were on vacation.  I called him to ask him what he put in it but he didn't write it down, or have a recipe either.  He just combined flavors that he liked, so I just did the same thing.

I have never cooked Chorizo sausage but I will be cooking it from here on out.  It was packed with so much spicy flavor that it brought the casserole up a notch...or two....or three!!  My son used fresh, russet potatoes in his casserole but I just didn't want to go to the trouble.  I was looking for a shortcut and I thought of the potatoes.  I didn't want to have to get up early to peel and chop potatoes and the OreIdas do all the work for you, so there you go.  However, if you want to make it all completely from scratch, then you definitely could.

I used three different skillets only because I didn't have a recipe and had not thought the whole thing through.  But, I wrote this recipe to help, you and me both, cut down on the amount of skillets used and therefore, cut down the amount of cleanup involved.  I love to cook but I HATE to clean up!

I made this for breakfast for friends and I served it with Salsa, fruit, and blueberry muffins.  My husband came home and ate it for lunch.  It is one of those dishes that can be served all day long, and, actually, for any meal.

Invite some friends over for this breakfast casserole and coffee...it is a great way to start the Summer off right!

HAPPY SUMMERTIME Y'ALL!


BREAKFAST CASSEROLE
(Serves 8-10 depending on what else is served and how big the appetites are)

1 - 32 ounce bag frozen Ore Ida Diced Potatoes
4 Tablespoons Canola Oil
2 teaspoons Chili Powder
1 teaspoon Cumin
Salt and Pepper to season the potatoes
1 lb. Chorizo Sausage
1 lb. Breakfast Sausage (I used Owen's Mild)
16 Eggs
1/4 cup Sour Cream
Salt and Pepper to season the eggs
1 medium Onion, diced
1 bunch Green Onions, chopped
1 medium Poblano Pepper, diced
4 cloves Garlic, minced
1/4 cup Cilantro, chopped
2 cups Cheddar Cheese, shredded
2 teaspoons Chili Powder
1 teaspoon Cumin

1.   In a large non-stick skillet over medium high heat, heat the canola oil.

2.   Add the Potatoes and sprinkle the chili powder, cumin, salt and pepper over them.

3.   Cook the potatoes, without turning, for about 10 minutes.  Turn the potatoes and cook another 7-10 minutes until golden brown.

4.   Spray a 13 X 9 baking dish with Pam and then place the potatoes in evenly.

5.   In the skillet you cooked the potatoes, or another skillet, brown the chorizo and the breakfast sausage.  Scoop the cooked sausage onto the potatoes evenly.

6.   You can either save some of the grease from the cooked sausage or you can start fresh with canola oil or butter to saute the veggies.

7.   In the skillet you used for the sausage or another skillet and using about 2-3 tablespoons of the sausage grease, canola oil, or butter, add the onion, green onions, garlic, and poblano pepper.  Cook until softened.

8.   Whisk or beat the eggs and the sour cream.  Add the cooked veggies, cilantro, cheese, chili powder, cumin and salt and pepper to taste.  Stir to combine.

9.   Pour the egg mixture over the potato and sausage mixture.

10.  Bake at 350 Degrees for 35-45 minutes until golden brown and center is set.


ENJOY!


Friday, March 27, 2015

TWICE BAKED POTATOES


TWICE BAKED POTATOES

4 large Baking Potatoes
8 slices Bacon, cooked until crispy,  divide in half
1 cup Sour Cream
1/2 cup Milk
4 tablespoons Butter
1/2 teaspoon Salt
1/2 teaspoon Pepper
1 cup shredded Cheddar Cheese, divided in half
8 Green Onions, chopped and divided in half

Preheat oven to 400 Degrees.

Bake for 1 hour or until a fork goes through the middle of the potato with ease.  The time will depend on the size of the potato.

When potatoes are done, set aside for 10-15 minutes to let them cool a little bit.

Decrease heat in the oven to 350 Degrees.

Slice the potatoes in half lengthwise and scoop out the middle.

Place the potatoes on a baking sheet.

Put the scooped out potato in a large bowl and add the butter and half of the cheese.

When cheese is melted, add the sour cream, butter, milk, half of the green onions, half of the bacon, salt and pepper.  Mix by hand, or with an electric hand mixer, until all are incorporated.

Spoon evenly into each potato and top with the rest of the cheese, green onions and bacon.


Place in the oven for an additional 15 minutes or until the cheese is melted on top.

Serve immediately.

ENJOY!

Tuesday, March 24, 2015


KEY LIME PIE

Graham Cracker Crust

Preheat Oven to 375 Degrees.

18 Graham Cracker Squares (1 package (not box) equals this amount)
6 tablespoons Butter, melted
1/4 cup Granulated Sugar

Place graham crackers in a food processor and process until they are finely ground.

Combine the graham crackers crumbs with the melted butter and sugar and mix until well combined.

Press into the bottom and up the sides of a 9 inch pie plate.

Bake for 7-9 minutes.

Remove from oven and place on a cooling rack.

Bump oven temperature down to 350 Degrees for the pie filling.

Filling:

4 Egg Yolks
(1) 14 ounce can Sweetened Condensed Milk
2-1/2 ounces Key Lime Juice

Combine egg yolks and milk at low speed.  Slowly add juice.

Pour into the pie crust.

Bake at 350 Degrees for 12-15 minutes.

Remove from oven and place on a cooling rack until completely cooled.

Top with Fresh Whipped Cream

Whipped Cream Topping:

1/2 Pint Heavy Whipping Cream
1/8 cup Granulated Sugar
1/2 teaspoon Vanilla

For the best results, place your beaters and bowl in the freezer for about 15 minutes before starting this recipe.

Take beaters and bowl out of freezer and pour all the ingredients into the bowl.

Beat at high speed until it is creamy and thick, approximately 2-3 minutes.

Spoon on top of your COOLED Key Lime Pie and place in the refrigerator until ready to serve.


ENJOY!


Friday, March 13, 2015

MINI CHICKEN AND BROCCOLI POT PIES


A friend of mine, Debbie Holst Gutierrez, alerted me to the fact that it was National "Pi" Day.  Not your ordinary Pie day, but she was making this really scrumptious looking Dark Chocolate Salted Caramel Oreo Pie,  Well this got me to thinking that I should "celebrate" this day too.  And that is why I ended up making these little delights.

I saw these the other day on Giada At Home, and since my 2 year old grandson, Alex, loves chicken and he loves broccoli, I thought these would be the perfect little bite-sized pot pies for his little hands.  He didn't eat one because he saw his other "love" on the counter moments before we ate....Macaroni and Cheese....it wins out everytime.  Oh well, I enjoyed making them and they were packed with really fabulous flavors.

I will say that these are a little time consuming so if you do not have time, just go ahead and using this filling to making one big pot pie. You will have to cook longer...maybe 30-45 minutes and probably back the heat down a little, but they would still be good.  In fact, I did both.  I doubled this recipe and made the mini's, and also made some individual pot pies that would feed 2 a piece.  I served this with a fruit salad but I think carrots would be great too.

They looked like little mini-quiches.  Wouldn't these be cute for a brunch or a bridal/baby shower?  I think they would be cute to announce that you are having a baby and make everything on the plate little, like little baby carrots, little new potatoes, etc.  They would also be perfect if you were announcing that you were having a new little grandbaby like I am!!

YES!!!! I AM HAVING A NEW GRANDBABY!!!

AND IT IS A BOY!!!!

AND HE IS DUE IN SEPTEMBER!!!

How is that for an announcement?? Haha!!

My daughter, Crystal and her boyfriend Ryan are expecting their first baby boy mid-September.  We are over the moon excited about this new little blessing that is on his precious little way.  This Nannie's heart swells every time I think about it!

I think your kids will  love these, but I loved them just as much....and the extra bonus was that I am expecting a very wonderful package in September!!  Love to you all!


MINI CHICKEN AND BROCCOLI POT PIES
(Makes 12 Minis)

Preheat oven to 400 degrees

1 Box of Refrigerated Pie Dough (2 10-inch pie rounds...I used Pillsbury)
2 tablespoons Flour
2 tablespoons Butter
2 Garlic Cloves, minced
3/4 - 1 cup Whole Milk, room temperature
1/4 cup of shredded Parmesan Cheese (fresh grated is the best)
Salt and Pepper to your liking
1 cup Rotisserie Chicken Breast, chopped small
1 cup fresh Broccoli, steamed and chopped small
1 egg, beaten

Melt the butter in a medium saucepan.  Add your garlic and saute for about 30 seconds.  Stir in the flour and cook for about a minute to remove the raw flour taste.


Whisk in the milk, stirring constantly to avoid lumps.  Stir until thickened like a gravy.

Add the Parmesan Cheese and stir to combine.

Taste now to see if you need more salt.  Add pepper to your liking.

Add the chicken and the broccoli.  Stir to coat the pieces.  Remove from heat and set aside.

Using a 3 inch round cookie cutter, cut out 12 rounds.

Using a 2 inch round cookie cutter, cut out 12 rounds.

Grease your mini muffin pan.  I use spray Olive Oil.

Place one 3 inch round in each hole of the miniature muffin pan and work to make sure it is even and comes out of the opening at the top a little all around.  Lightly flatten the edges.

Put a small amount of chicken/broccoli filling in each hole.  Not too much, because you do not want that coming out.

Using a pastry brush, brush some of the egg mixture around the flattened edges and place the 2 inch round piece of pastry on top.  The egg acts like a glue.  Lightly, mash to seal the edges.  After this step, you could use a fork to lightly make marks all around the edge....it just looks cute.

Brush a little more of the beaten egg on top.  It turns the top a beautiful, golden brown when baking.

Next, make a slit on top of each mini pot pie so that the steam can escape while cooking.

Place in the oven for 15-18 minutes.

When they come out, I would let them rest for about 5 minutes before attempting to remove them from the muffin pan.  When they are cool, they come out perfectly but when they are hot, they need a little coaxing.

I just got a small pan and placed it gently on top of the muffins, so not to mash them.  Then I flipped them slowly upside-down and just left them like that for about 30 seconds.  There may be some that are stubborn so if you can wait just a few more minutes, they should come right out or you can try "helping" out of their spots.

And there you go, little mini Chicken and Broccoli Pot Pies.

ENJOY!

CLICK HERE FOR PRINTABLE RECIPE