Thursday, July 31, 2014


BLUEBERRY ZUCCHINI BREAD

I love blueberry season! 
 There is nothing better than eating a handful of freshly picked blueberries.  I found myself having so many blueberries the other day that they were in danger of going bad in my fridge.  I couldn't let that happen. 

 I remembered seeing a recipe for Blueberry Zucchini Bread a while back.  I had never had any but it just sounded good.  I made some the other day and it was soooo good...especially with a dollop of real butter on top.  Oh my gosh, I could make myself sick on this bread.  I have now made 6 loaves and will make more as soon as I get a chance!  


These loaves were so moist and even though there is zucchini in the recipe, you cannot taste it.  If you look closely, you can see some specks of green.  I think the zucchini just gives it the moisture it needs for a soft texture.


BLUEBERRY ZUCCHINI BREAD

3 Eggs, lightly beaten
1 cup Vegetable Oil
3 teaspoons Vanilla Extract
2 cups Sugar
2 cups shredded Zucchini
3 cups All Purpose Flour
1 teaspoon Salt
1 teaspoon Baking Powder
1/4 teaspoon Baking Soda
1 Tablespoon Ground Cinnamon
1 pint Fresh Blueberries

Preheat Oven to 350 Degrees.

In a large bowl, beat together the eggs, oil, vanilla, and sugar.  Fold in the zucchini.  
Beat in the flour, salt, baking powder, baking soda, and cinnamon.  Gently fold in the blueberries.
Lightly grease or spray with Baker's Joy, 3 - 8 inch X 3-7/8 inch X 2-15/32 inch loaf pans.
Pour mixture evenly into pans.
Bake 50 minutes in the preheated oven, or until a knife inserted in the center of a loaf comes out clean.  
Cool 20 minutes in pans, then turn out onto wire racks to cool completely.

ENJOY!

Saturday, July 19, 2014


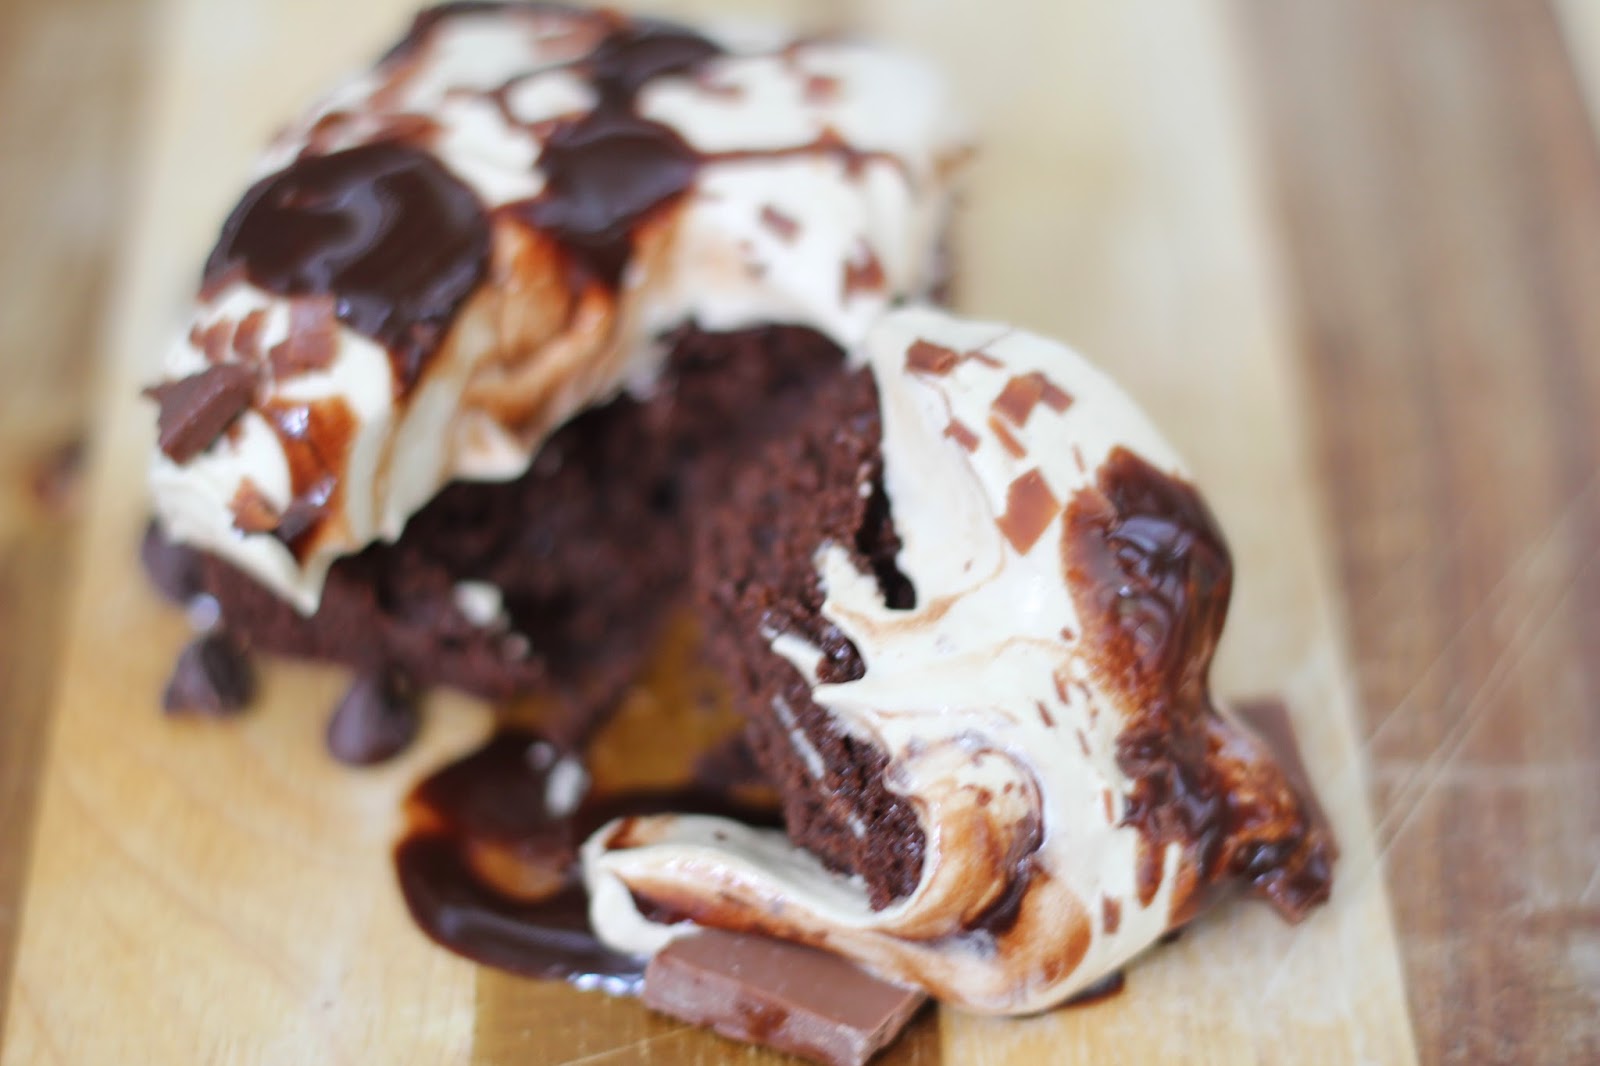
CHOCOLATE MOCHA CREAM CAKE

This cake is one of my Top 5 favorite cakes ever!!!  As a matter of fact, when I asked my son what dessert he wanted for his birthday last week, this is the one he chose...it's just that awesome!

I found this recipe years ago in a Cooking Light magazine.  The reason I decided to try it was because it had won first prize in one of their contests.  We were trying to find desserts that were lower in calories and fat so, I figured if it had won first prize then it was worth a try.  I am sooooo glad I did.  This cake is lower in fat than most cakes but it does not taste like it at all.   It is super moist and so fluffy and is chocked full of chocolatey yumminess.  The coffee adds a flavor that takes it right over the top!  

The cake has no eggs, no butter, no milk, and only 3 tablespoons of canola oil.  The moisture comes from reduced-fat mayonnaise.  I guess you could argue that mayo does have eggs, but reduced fat mayo has just egg whites...and oil.  There are 16 servings in this cake so, those are pretty large pieces.  Each piece of cake has 8.1 grams of fat, 315 calories, 1.8 grams of fiber, 390 mg sodium, 60 grams of carbohydrates and no cholesterol.  Those numbers compared to other cakes are pretty impressive.

If you are on a diet and feel the need to cheat, you could do it with this cake and the guilt factor would be minimal!  You could have your chocolate fix without being set behind too far in your diet!  It is a perfect cheat food!

Talking about it is not a good thing though.  I am now wanting a piece and there is none left...ugh...this could be bad. 


CHOCOLATE MOCHA CREAM CAKE

CAKE

2 cups All Purpose Flour
1 cup Granulated Sugar
1 cup Dark Brown Sugar, packed
3/4 cup Unsweetened Cocoa
1-1/2 teaspoons Baking Soda
1-1/2 teaspoons Baking Powder
1/2 teaspoon Salt
1 cup Reduced-Fat Mayonnaise
3 tablespoons Canola Oil
1 cup Hot, Strong Brewed Coffee
2 teaspoons Pure Vanilla Extract (not imitation)
1/3 cup Semi-Sweet Chocolate Morsels (I like the minis)

MOCHA CREAM

1/4 cup Boiling Water
1 tablespoon Instant Coffee Granules
1 (7 ounce) jar Marshmallow Creme
1 (8 ounce) container frozen Lite Cool Whip 
1/3 cup Hershey's Lite Syrup
Candy Bar pieces and shavings, optional

Preheat oven to 350 Degrees
To prepare cake, lightly spoon flour into dry measuring cups, level with a knife.  Combine flour and next 6 ingredients in a large bowl.  Add mayonnaise and oil, beat with a mixer at low speed until well blended.  Slowly add brewed coffee and vanilla, beat with a mixer at low speed 1 minute or until well blended.  Stir in chocolate, pour batter into a 9 X 13 baking pan that has been sprayed with Baker's Joy or greased and floured.  Bake at 350 degrees for 30 minutes or until a wooden toothpick inserted in center comes out clean.  Cool completely in pan on a wire rack.

To prepare Mocha Cream, combine water and coffee granules in a large bowl, stir until granules dissolve.  Add marshmallow creme, beat with a mixer at low speed until smooth.  Fold in whipped topping.  Spread mocha cream over top of cake. 

 Chill until ready to serve.  

When ready to serve, drizzle the chocolate syrup over the top of the cake and sprinkle broken pieces of a chocolate bar and chocolate shavings over the top.  Serves 16


ENJOY!

CLICK HERE FOR PRINTABLE RECIPE


This piece was my photo slice....I love having to clean up my mess...it was divine!


Thursday, July 17, 2014


TEX-MEX BLACKEYE PEAS

If you are like me, you probably had never put tex-mex together with blackeye peas.  Well, that was before a friend of mine, Dolores, brought me some homemade chicken tamales and these awesome peas.  They absolutely topped any charra beans I have ever had.  Of course I had to have the recipe.  I mean this was a dish I knew I was going to want to make over and over again.  She did one better, she came over and showed me how to make them.

Now, she did use canned peas and I have done that before.  If you are short on time, you can use canned peas, but last week, for Christopher's birthday, I decided to use frozen peas and I think they were better.  But then I always prefer fresh or frozen.  Also, now that I have a 16 month old grandson, I did not want these to be spicy or hot so I did replace the jalapenos with bell pepper which was just as good, just not as hot.  I used a beef and pork mix sausage with green onions (just because I like green onions) but you could use any sausage you want.  I also tried to trim the bacon of any excess fat on the ends.  When you cut the sausage and the bacon, make sure you dice them into small pieces.  

All in all, this is a very easy recipe...just a little time consuming.  Trust me, you will not mind the extra effort when you taste them and you will enjoy the oohs and ahhs from your friends and family!  Perfect tex-mex side!


TEX-MEX BLACKEYE PEAS
(Serves 8-10)

4 regular cans Blackeye Peas

OR

2 regular size bags frozen Blackeye Peas (cook according to directions on bag)

6 Roma Tomatoes, seeds removed and diced
1 small Onion, diced
6-8 cloves Garlic, minced
1-2 Jalapenos, chopped very small (or use equal amount of bell pepper)
1 bunch of Cilantro, coarsely chopped
1/2 package Bacon (8-10 pieces), diced small
1 regular package Sausage, cut into small pieces (I used a pork-beef mix with green onion)
1-2 cans of Chicken Broth (I use Campbell's)
Salt and Pepper to taste

In a large dutch oven, cook the bacon and sausage. Pour all but 2 tablespoons of grease off and add onions. Cook until onions are transparent.  Add garlic and cook for about 1 minutes to release the flavor and then add jalapenos and tomatoes.  Cook for about 2 more minutes.  

Add the peas with juice to the bacon mixture.  Add the chicken broth and cilantro.  Bring to a boil, reduce heat and simmer for 30-45 minutes.

ENJOY!


CLICK HERE FOR PRINTABLE RECIPE


Tuesday, July 15, 2014

TEX-MEX FAJITAS

If you live in Texas, you probably have a favorite mexican restaurant that you swear has the best fajitas around.  In the town where I live, we have 8 mexican food restaurants (that I can think of off of the top of my head) within a 5 mile radius....we love our mexican food here!  I mean how can you go wrong?!  I look at fajitas as one of the healthiest dishes I can order at a mexican restaurant....grilled meat, grilled veggies, fresh pico de gallo.   I left out the flour tortilla on purpose...probably not the healthiest but most definitely one of my weaknesses.  It all comes out sizzlin' on a black, cast iron skillet and the smell is to die for!!!

Last week, my son had his 29th birthday.  His request was mexican food.  I remembered that I had this great marinade for fajitas that I had not used in a very long time.  I mean with 8 mexican restaurants around....who needs to cook?!  Anyway, it was definitely a hit.  This marinade has a perfect combination of flavors and the meat comes out tender, juicy and full of flavor.  I used it for chicken and beef and actually used tenderized skirt steak.  I did not even know you could get skirt steak tenderized, but it was so worth it and I will be doing that from now on.  I left the meat whole when marinating and grilling and didn't slice it until we were ready to serve.  My son, who is a chef, used a cast iron skillet to caramelize the onions and cook the peppers. 

 Fajitas are really so easy to make at home.  I literally put the meat in a bag, poured the marinade over it and left it for approximately 6-7 hours, turning it every hour or so.  I then threw the meat on a hot grill.  It cooks fast, so don't get distracted or it will dry out and become chewy.  Because skirt steak is a tougher meat, it is important that you cut the meat against the grain, in thin strips, when it is done.  That will ensure that the fajitas will be tender.  I also sliced my chicken after it was done...I just think it is juicier and stays more tender that way.  It is also way easier to cook on the grill.

Sliced onions and green peppers cook really nicely in a cast iron skillet.  I would cook the onions first and caramelize them.  I like my peppers with a little crunch so after the onions were done, Chris threw the peppers in with a little bit of butter and cooked them.  

We had a literal Mexican Fiesta for Christopher's birthday.  We had tamales from a local restaurant, these awesome spicy beans (peas) that I will blog next,

 two kinds of quinoa, chile con queso, guacamole, salad, strawberry cheesecake (courtesy of my sister-in-law Judy...I will have to get the recipe and blog it), and mocha chocolate cake that I will blog later, as well. 


It was a really fun time celebrating his birthday and fixing all of his favorites!  There is something about fixing a homecooked meal or dessert for birthdays that I love.  It is my way of showing that person that I care and a way to make them feel special.  I sure love my Christopher and like I told him...He will always be my baby no matter how old he gets...its a momma-thing!


TEX-MEX FAJITAS
(Serves 4-6)

2 pounds Flank or Skirt Steak
1/4 Cup Oil
1/4 Cup Soy Sauce
1/4 Cup Lime Juice (fresh squeezed)
2 Tablespoons Pickapeppa Sauce
Chili Powder
Steak Seasoning

Mix oil, soy sauce, lime juice and Pickapeppa sauce.

(I would compare this to an A-1 Sauce)
Pour over meat in a zip-lock bag.  If you are marinating both chicken and beef, use separate bags.  Sprinkle liberally with Chili Powder and Steak Seasoning.  I don't have an exact measurement for this but if I had to guess I would start with a couple of tablespoons of each.  It is just a marinade.  I kind of looked at it like this...there is a whole lot more salt in a brine than this marinade, so I did not worry too much about the saltiness of it.  I just wanted it to be very flavorful and that is what salt and spice is for.

Place meat on a hot grill until done, about 7 minutes on each side for beef and about 12 minutes for chicken, depending on the thickness. 

Serve with sliced onions, peppers, sour cream, guacamole, pico de gallo, and/or salsa on a flour or corn tortilla.


ENJOY!


Wednesday, July 9, 2014


 ROASTED BUTTERNUT SQUASH WITH CARAMELIZED ONIONS
 
 
First, let me say, I could eat this dish, by itself, as an entire meal.  That is how much I LOVE it!
 
If you are bored with the same old side dishes and are in the mood to try something new....this should be the one you give a whirl!
 
The first time I ever ate this was at Whole Foods Market in Austin, Texas.  Me and some of my friends had gone there to shop after a birthday weekend at my friend Valerie's house in Kyle.  We thought we would only be in Whole Foods for about an hour....3 hours later we were hungry and their café dishes looked so scrumptious.  If you have never been to a Whole Foods Market, it is worth seeking out.  It is a literal one-stop, natural and organic supermarket and so much more.  Google them....really awesome store.
 
Anyway, we all decided to all order different things so we could get a taste of several of their dishes.  I got the roasted butternut squash and caramelized onions. Oh my gosh...absolutely amazing! I came home and was on a mission to figure out how to make it.  It was either that or make a trip to Austin once a week...either one was  good option!
 
The squash and the caramelized onions complemented each other so perfectly.  There is just something about caramelized onions that make everything taste scrump-dilly-ump. If you do not like raw onions, do not let that stop you from trying this dish.  Caramelized onions taste completely different.  They have a deep, rich, sweet flavor and I used butter to caramelize mine, so they are doubly yummy.  They take about 20 minutes to make but you can do that while the squash is roasting.  Last night, I served it with grilled fish and my lemon brocollini dish on this blog.  It was on the table from start to finish in about 45 minutes...maybe a little less.

Butternut squash can be difficult to cut up.  I've done it but when I found it already diced, in a container, in the produce section of my local grocery store, HEB, I grabbed it.  It was the perfect amount for serving 4 people (about 3 cups).  I am all about making things easier when it doesn't affect the outcome.
 
I would love to hear from you when you try this dish...or any of the dishes here on the blog.  Y'all inspire me and keep me cooking and looking for new recipes.  {{Hugs}} to you all!


ROASTED BUTTERNUT SQUASH AND CARAMELIZED ONIONS
 
Roasted Squash
3-4 cups of Butternut Squash, diced
2 tablespoons Olive Oil
Salt and Pepper
 
Caramelized Onions
2  large Yellow Onions, sliced into rings
2 tablespoons Butter
2 teaspoons Sugar
Salt and Pepper
 
In a medium sized bowl, combine diced butternut squash, olive oil, salt and pepper. 
Toss to coat well and place on a parchment lined, cookie sheet in a 400 degree oven for 15-20 minutes.


In a large sauté pan over medium high heat, melt the butter . 


Add the onion and sugar. 


Stir and cook for approximately 20 minutes, stirring frequently (especially at the end) to keep from sticking and burning. 


 Add salt and pepper to your liking.  Onions will be done when they reach a rich, brown color.


Put the butternut squash into a medium sized, heat resistant bowl. 


Add the caramelized onions. 


Toss gently and serve immediately.


ENJOY!


Tuesday, July 8, 2014

CHEESECAKE TARTS


CHEESECAKE TARTS
 
Do you love cheesecake?  Who doesn't....right?
 
These little yummies are absolutely melt-in-your-mouth perfect!  I so wanted to get this recipe on my blog for the 4th of July because they are the perfect Red, White and Blue dessert....but I failed miserably.  So sorry : (

I found this recipe many years ago in a Southern Living cookbook.  It is considered one of their Hall of Fame Dessert Classics and I totally agree.  I have made these so many times, for so many occasions, and there are never any left.  If you want a recipe that appeals to the majority (if not all) of people, then this is a recipe you have got to try.  It is super easy to make and makes such a pretty presentation.

There are a few things that you might find helpful.  First, this recipe only makes 12 servings so I always double....this recipe is easy to do that with.  Second, I find that the foil cupcake liners make the best choice for this recipe because they are more substantial and do not become wet or soggy.  Third, I always use canned fruit filling.  One can is perfect for 24 tarts but, if you want more than one filling choice, you will have leftover filling.  You can put that filling in containers and place in refrigerator to use as a topping for ice cream or maybe pound cake.  I have not tried to freeze it but I would think it would freeze nicely. 

I am convinced this recipe is going to become one of your favorites, just like it is one of mine.  I mean it is a Southern Living favorite...how can you go wrong?!


CHEESECAKE TARTS

2 (8 ounce) packages Cream Cheese, softened
1 cup Sugar
2 Eggs
1 teaspoon Vanilla Extract
12 Vanilla Wafers
Cherry or Blueberry Filling

Preheat oven to 350 degrees.

Beat cream cheese at medium speed of an electric mixer until light and fluffy.  Gradually add sugar, mixing well.  Add eggs, one at a time, beating well after each addition.  Stir in vanilla.

Place a vanilla wafer in each paper-lined cup of a muffin pan.  Spoon cream cheese mixture over wafers, filling cups full. 

Bake at 350 degrees for 20 minutes.  Leave in muffin pan, cover and chill overnight.

To serve, top with a small amount of pie filling.

Yield: 12 Servings

ENJOY!

CLICK HERE FOR PRINTABLE RECIPE