Tuesday, December 4, 2012

KICKED UP BROCCOLI-RICE CASSEROLE


 My friend Kelly made this recipe a couple of years ago.  I'm pretty sure she brought it to our annual Bunco CHRISTmas party.  The recipe is from Southern Lady Holidays 2009 and it is sooo good!  I just don't think you can mess up a recipe with those crunchy, yummy french fried onions on top   I made it this year for Thanksgiving and I changed it up a bit.  Then I made it again tonight and changed it up a little bit more.  

First of all,  this was only a Broccoli Casserole and I decided to add rice to it.  Therefore it is now a "Broccoli Rice Casserole".   Tonight, I decided to add cheddar cheese to the monterrey jack cheese....which I thought was really good too.  

Last but not least, my daughter, Holly, is pregnant and she craves spicy anything.  She literally carries a bottle of hot sauce with her just about everywhere she goes...haha!  So, I decided tonight to add some jalapenos to this recipe too.  Not enough peppers to be too terribly hot, but just enough to feel a little heat.  So, now it is a Kicked Up Broccoli Rice Casserole!

All of these changes added several layers of flavor and I think that this is the way I will make it from now on! 


KICKED UP BROCCOLI-RICE CASSEROLE
Serves 8-10 people

2 quarts of water
1-lb. broccoli florets
1 teaspoon salt
1/4 cup butter
1 large yellow onion, chopped
1 (8-ounce)package sliced baby portabella mushrooms
1 medium red bell pepper, chopped
4 garlic cloves, minced
1 cup cooked rice
3 tablespoons jalapenos, chopped
3 tablespoons all-purpose flour
1-1/2 cups milk
8 ounces Cheddar and Monterrey Jack cheese blend
1 teaspoon salt
1/2 teaspoon ground black pepper
1-(6 ounce) can French fried onions


PREHEAT OVEN TO 350 degrees.

Spray an 8 x 8 baking dish with nonstick cooking spray; set aside

In a 4 quart saucepan, bring water and 1 teaspoon salt to a boil.  Add broccoli; cook for 3 minutes, drain, and set aside.

In a medium skillet, melt butter over medium heat.  Add onion, bell pepper and garlic; cook for 6 to 8 minutes; stirring frequently, until tender.

Add the sliced mushrooms and....

Saute for about 3-4 minutes.


Add 3 tablespoons of chopped jalapeno pepper


Add the rice and saute for about 1 minutes.


Next add the flour and cook for 2 minutes, stirring constantly, until thickened.

Gradually add milk; cook for 2 minutes, stirring constantly, until thickened.


Add cheese, remaining 1 teaspoon salt, and pepper, stirring until cheese is melted; remove from heat. 


Rough chop broccoli and stir into mixture

Spoon broccoli mixture into prepared baking dish and bake for 30 minutes, or until bubbly.

Top with French fried onions; bake for 5 minutes....

until lightly browned.

ENJOY!


Sunday, December 2, 2012

CHOCOLATE SILK MERINGUE PIE - JOHN BERENDT'S FAVORITE ANGEL PIE

I was at our ranch house and forgot to bring a pan from home so I had to make it in a disposable pan! 

Let me just say right now that this pie is the most delectable, smooth, satisfying chocolate pie I have ever eaten.  

I used to make a Chocolate Silk Pie that I adored but it is made with uncooked eggs and I just could not risk eating it.  I sure have missed that pie!  So, when I found this recipe in my "The Lady and Sons Just Desserts" cookbook by Paula Deen, I was hoping that it would be close to that Chocolate Silk I used to love!  

It did not let me down...it is DIVINE!!  It is smooth as silk and is the most amazing chocoate pie I have ever eaten.  Now a pie this good is worth the extra effort that this one calls for.  I have made it several times and it does require precision...no cutting corners....but I tell you I think I could literally eat myself into chocolate heaven with this pie.

The pie "crust" is not a traditional one.  The "crust" is a meringue.  It is light and crunchy and goes perfectly with the chocolate mousse and the homemade whipped cream.

Oh and one more thing...start this pie early in the day!  It takes a few hours from start to finish.  

Let the ooh-ing and ahh-ing begin!!!


JOHN BERENDT'S FAVORITE ANGEL PIE

MERINGUE:
4 egg whites, at room temperature
1-1/3 cups sugar
2 teaspoons cornstarch
2 teaspoons white venegar
1/4 teaspoon pure vanilla extract

FILLING:
(3) 1-ounce squares unsweetened chocolate
4 egg yolks
1/2 cup sugar
1/8 teaspoon salt
2 tablespoons water
1 cup heavy cream, whipped

PREHEAT OVEN TO 450 Degrees
Grease a 9 or 10 inch pie pan

Beat egg whites with a handheld electric mixer

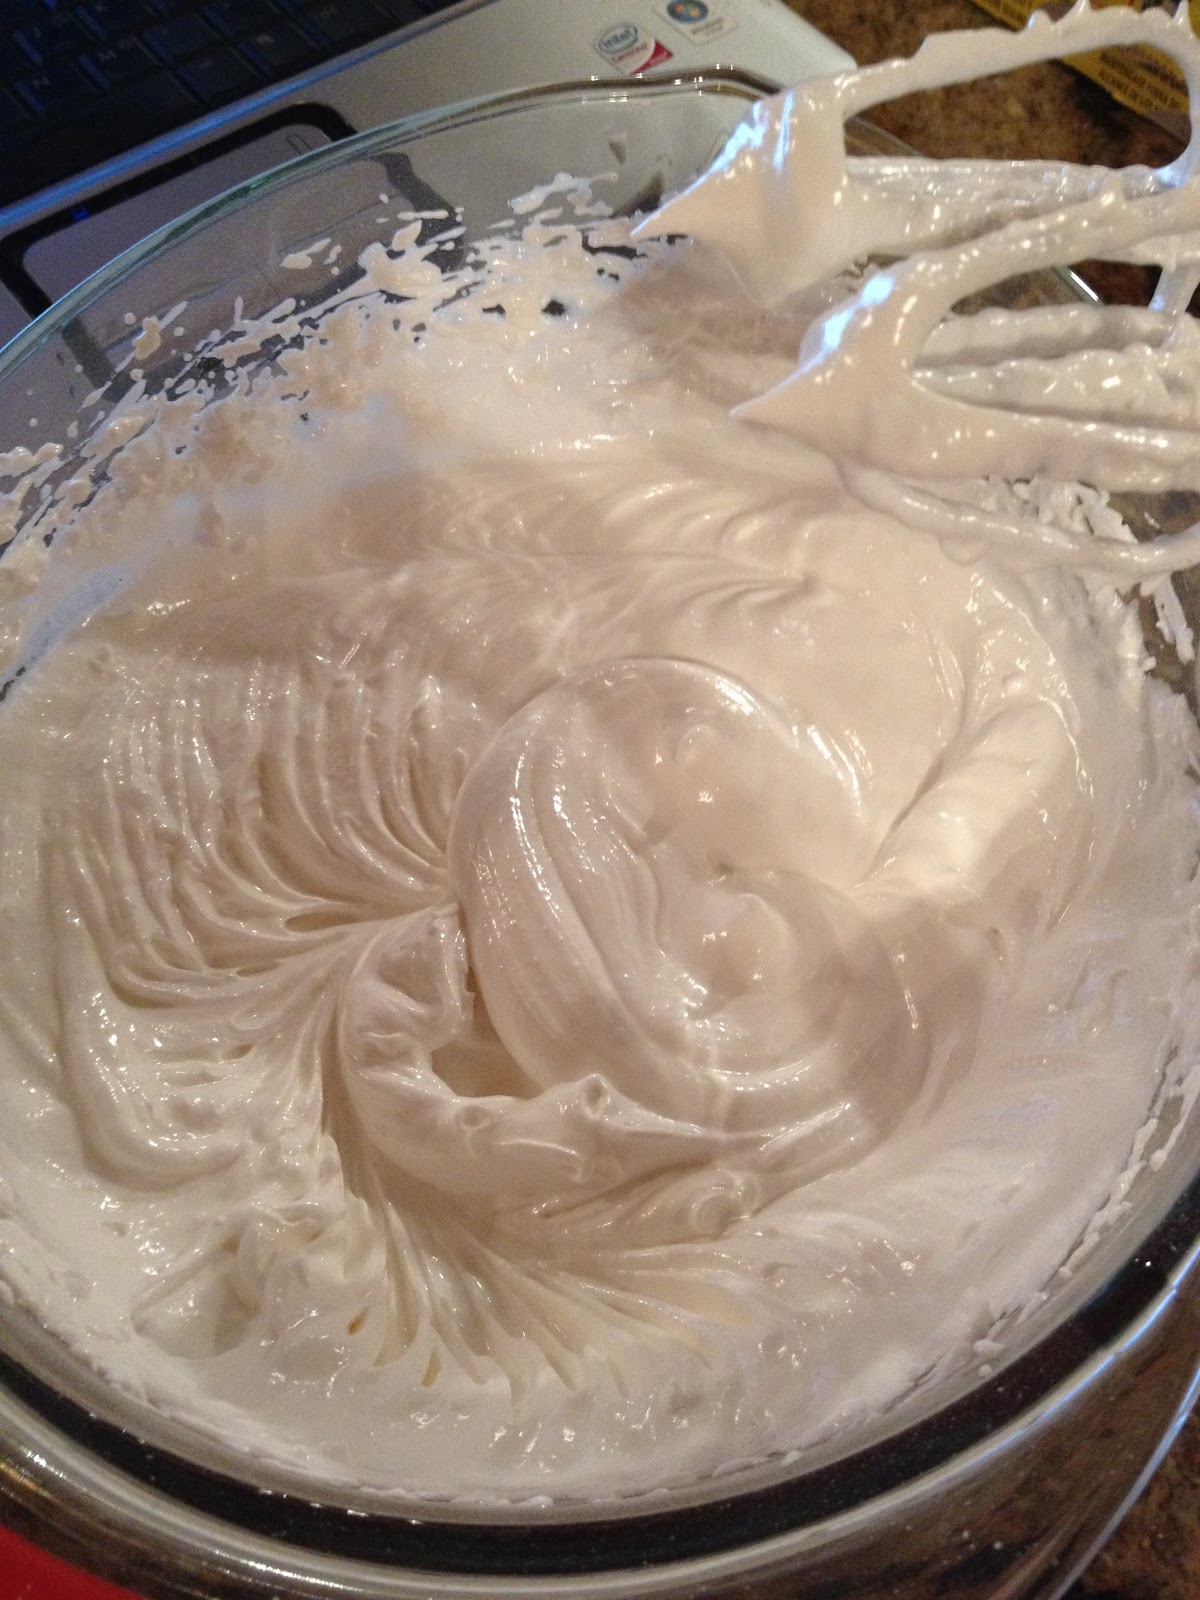
Until soft peaks form

Stir together sugar and cornstarch in a bowl, then add 2 tablespoons at a time to egg whites

Beat well between additions until the THIRD addition

After THIRD addition, beat in vinegar

Before LAST addition, beat in vanilla

Turn into prepared pan

Push tightly against sides to form a pie crust

Place in oven and turn OFF oven heat

Leave pie for at least 3 hours

For filling, melt chocolate in top of a double boiler.  Since I don't have one, I just put water in a saucepot and rested the bowl with the chocolate on top of the saucepot.  Be careful to not burn yourself, the bowl gets hot.

In another bowl, beat yolks, sugar, salt, and water thoroughly

Stir mixture into melted chocolate

Cook over boiling water, stirring constantly

Until very thick

Set aside and cool completely

Put a bowl and your mixing beaters in the freezer

Pour 1 cup of whipping cream into the bowl and beat on high

I always add about 1 tablespoon of sugar and 1/2 teaspoon of vanilla


Beat until the cream becomes fluffy like Cool Whip.  This only takes about 2 minutes 


Fold the cooled chocolate mixture into the whipped cream

Mix thoroughly

Spoon into the meringue crust that has been cooled completely

Chill overnight.

Mix up another cup of whipping cream and dollop it on top before serving

Top with chocolate shavings and.....

ENJOY!


Saturday, December 1, 2012

CHICKEN AND CORNBREAD DRESSING


For the past few years, my mom and I have been making Chicken and Cornbread Dressing.  My mother-in-law had always made it but one year, somehow, my mom and I got the task.  My mother-in-law made the BEST dressing so it made us very nervous to have the responsibility of making it for everyone on Thanksgiving Day.  If we messed it up, it would "ruin" the Thanksgiving meal for everyone...geesh....so much pressure!  

We were not EVEN prepared for how much time it would take to make it and when we were done we joked that "maybe we should mess it up so we wouldn't have to do it again"! Haha!  But, much to our surprise it turned out good and then we became the "designated" Chicken and Cornbread Dressing makers in our family.  My kids started pitching in and helping so it became a family tradition.  

This year was the first time my Mom, because of her health, was not able to participate...that was a sad turning point but I am glad to have the memories.  We spent our Thanksgiving at our ranch in San Antonio and me and my daughter, Holly, made the dressing.  My son is probably the one who loves to help the most and he had to miss it because we make it the night before.  Really missed him...he is a great cook!  It's funny how something so insignificant such as making a recipe can turn into something so special.  This year, my stepdaughter and her Mom, used the recipe and made it for their Thanksgiving meal too!  

I don't think I took as many pictures as I normally would, but I will share all that I have so that you will have a step by step guide for how to make this Chicken and Cornbread Dressing with Chicken Gravy.  I know a lot of people make giblet gravy and I have made it before but no one likes it in my family so instead I set aside some chicken and made gravy.  This year I cheated and used Pioneer Chicken Gravy packets...gasp!  Ha!  But I added some green onions and some cooked chicken and it was surprisingly yummy!  Actually, I think I might just use it again next year!

Our family has been blessed so richly by a God who gives us more than we could ever ask or think.  We had a wonderful Thanksgiving and I hope you all had a very blessed Thanksgiving as well!  Thank so much for stopping by and letting me share what I enjoy doing...talking and cooking!

CHICKEN AND CORNBREAD DRESSING 

8 packages of Martha White Yellow Cornbread Mix, cooked and set aside

5 pounds boneless chicken pieces, boiled in salted, peppered water and set aside (reserve the water to use in the dressing) 

4 bunches green onions, chopped
1 yellow onion, chopped
1/2 cluster of celery, chopped
6 boiled eggs, chopped
4 cans Campbells cream of chicken soup
4 cans Campbells chicken broth
3-4 cups of chicken broth that was made from boiling the chicken
10 raw eggs
2 teaspoons poultry seasoning
Salt and Pepper

Combine green onions, onion, and celery in a microwave safe bowl with water almost covering the veggies.  

Place the bowl in the microwave and cook on high until they are soft.  Set aside.

In a very large bowl crumble the cornbread.

Add the chopped boiled eggs.

Add the cooked veggies.

Pour in the cream of chicken soup

Pour in the Campbell's chicken broth.

Stir well.

Add the eggs and stir well.

Sprinkle the poultry seasoning over the top and stir well.


Add the water from the veggies.

Now this is where I am going to have to tell you approximately how much of the chicken broth that was made from the boiled chicken to use.  I would say you would use 3-4 cups.  Add it one cup at a time.  
You want the consistency to be very moist.  The cornbread will continue to absorb the liquid overnight and the more liquid you add the more moist your dressing will be when it is cooked.  

Add salt and pepper.  I taste to check for the salt level but only a small one because of the raw eggs.  You could just skip the tasting and let everyone salt it themselves.  Just add pepper. 
Cover and refrigerate in the bowl until the next morning.

OR

Assemble, bake and serve.

ASSEMBLY:
Pour or spoon half of the cornbread mixture into a roaster.  Mine is approximately 10 X 14-1/2

Shred the chicken and put it on top of the dressing.

Pour or spoon the rest of the dressing on top of the chicken.

Bake uncovered in a 350 degree oven for 2-1/2 to 3 hours.

**Because my kids love dressing so much, I usually set aside some dressing and chicken and make a small foil 8 X 8 pan (the picture is at the top of this page) and put it in the freezer for later.  When I am ready to cook it, I take it out of the freezer and thaw for a few hours and then pop it in the oven until it is done.  The time will depend on how thawed it is but because it is not as thick, it does not take as long as the larger roaster pan.  Remember, the chicken is cooked so you are just cooking the dressing part.

If the edges begin to brown too much, tear off 4 narrow strips of aluminum foil and cover edges or tear off one long piece and cut out the middle so that it covers the edges but leaves the middle uncovered. 

ENJOY!