Thursday, August 30, 2012

REFRESHING HOMEMADE LEMONADE


Sometimes, tea just doesn't do it, a soda just leaves you even thirstier than before, and a water is just so bleh!

But Lemonade...a big glass of icy, sweet, tangy lemonade...now that's what I'm talking about!

For the next couple of weeks, my daughter Holly and her husband, Daniel, will be living with us while their home is being finished.  So, when I came home today and Holly was squeezing lemons to make some of that yummy lemonade, I thought to myself first..."Well this is pretty nice! second..."I cannot wait to get a big glass of that" and third... "I've got to grab my camera and blog this!"  

Now, I have gadgets coming out of my ears and so that means I have about 4 or 5 different gadgets to get the juice out of lemons. (I probably should've taken a picture of my gadget drawers...they are crazy full).  Anyway, she had found a wooden lemon reamer and was using it to juice the lemons.


And that works pretty good except that she had a small cut on her finger and the reamer was allowing the juice to get on her finger and sting.  So, I thought of the hand held lemon squeezer.  I actually have two of them because I forgot I had already bought one and bought another one...ugh!  


This worked like a charm and really fast too!  It squeezes every bit of juice that there is out of a lemon halve.


Now all you have to do is add a little sugar (or a lot) and some warm water and then a lot of ice...
and you have a thirst quencher.....and a healthy one at that.


So, needless to say, I was very excited to come home to find Holly making some good ole-fashioned lemonade...makes my mouth water just thinking about it! 

You could add strawberries or raspberries to this and it would be wonderful.  Or you could add some pomegranate juice or syrups and change the flavor entirely.  This recipe is super easy to make and definitely worth giving a shot.

So, here is Holly's recipe for Refreshing Homemade  Lemonade...hope you get to make and enjoy some soon!


REFRESHING HOMEMADE LEMONADE

Juice of 6 large lemons
1 cup of sugar
6 cups of warm water (warm water allows the sugar to melt)

Combine juice with sugar and add water.  Stir and pour over ice.

ENJOY!!

Wednesday, August 29, 2012

CHICKEN POT PIE


Around my house this recipe is better known as Chicken "Pox" Pie"! Ha!

When my kids were 3 and 6 they both got chicken pox at the same time!  But the real kicker was that I got chicken pox right along with them!  Seriously, what are the odds?

My sweet friend, Matresa Wooding, felt sorry for us and made this awesome chicken pot pie and brought it over to us.  Thus the name...Chicken Pox Pie!

Let me just say....I didn't even like chicken pot pie until I ate this one!  I made it a little different today by using fresh vegetables instead of canned.  But I have always made it using the recipe, exactly as it is written.  I have made this recipe so many times for friends of mine when I have wanted to bring them a meal and I have given this recipe out probably more than any other.  It makes 2 pies so you can share one and keep the other for yourself.  You can also bake one now and freeze the contents in a freezer bag without the crust for another day.  When you are ready to cook the pie, defrost the veggies, pour into a crust and bake.

I made a smaller pie today to bring to a woman who is precious to me.  Her name is Jane Guynes and she is 94 years old.  I have known her my entire life.  I went to visit her the other day and I asked her what she wanted me to cook for her and she said in her little, high-pitched voice..."I want a chicken pot pie.  But I don't want one of those you put in the microwave."  So this one is for her!

I am freezing this for a couple of days until I can go to visit her.
I promise that if you make this Chicken Pot Pie recipe that it will become one of your favorite go-to meals!


CHICKEN POT PIE
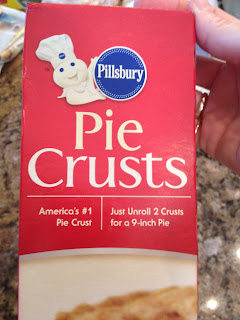
2 packages deep dish pie crusts
3 pound chicken breasts, boiled and cut up
1 medium onion, diced
4 stalks celery, diced
1 medium bell pepper, chopped
1 bunch green onions, chopped
9 cloves of garlic, chopped

1/2 pound green beans, cut into 2 inch pieces
5 carrots, peeled and chopped into small circles
1-1/2 lbs red potatoes, peeled and diced into small pieces
1-1/4 cup corn (I use frozen)
OR IN PLACE OF THE LAST 4 INGREDIENTS USE:
1 can Veg-All, drained
1 can corn, drained

1 small can evaporated milk
1 can Cream of Mushroom soup
1 can Cream of Chicken soup
2 tablespoons chicken bouillon

Bring water to boil in a large soup pot or dutch oven and add 2-3 tablespoons of salt.

Chop the vegetables


Add the chopped vegetables to the boiling water. 
**At this point, if you have decided to use Veg-All and can corn, just add the onion, celery, bell pepper and green onions to the water.


Add 2 tablespoons of garlic powder

Scoop the veggies out of the water.

Add frozen corn to the water and cook according to the package.
Remove from water.


Add the chicken to the veggie water, boil and remove from water.


Chop the chicken into small, bite-size bites and pour into a large bowl.

Add the vegetables. 
**If you are using Veg-All then add it now along with the corn, onions, bell peppers, celery, garlic, and green onions.


Add the soups


Add chicken granules 


Pour in the evaporated milk


Add Pepper and stir ingredients together


Place a pie crust into a pie pan and pour half of the mixture into the uncooked crust.


Place top crust on pie and crimp the edges


Then let's make it pretty

Here is the pie with the "ruffles". Now cut slits in the top to allow steam to escape.


Beat one egg and then brush over the pie.


Bake at 350 degrees for 1 hour.

This pie on the left has an egg wash and the one on the right does not


This pie has a wonderful flavor.  I served it with a big fruit salad and fresh baked bread and butter.

ENJOY!


Monday, August 27, 2012

CREAMY SOUTHERN MASHED POTATOES


I guess my theme this week is going to be finding the perfect recipe because that is what I consider this mashed potato recipe to be.  

I have tried different ways to make mashed potatoes over the years.  I love my mashed potatoes to be creamy, buttery and smooth.  I hate when I go to a restaurant and I am served mashed potatoes and they are so dry that you have to have gravy to eat them.  It shouldn't be that way. 

Just like there are many ways to mix up a good cake, there are equally as many recipes for how to prepare mashed potatoes. 

 So...start your mixers...we are about to make some 
good-ole-down-home-creamy-southern mashed potatoes 
like your grandmother used to make!


CREAMY MASHED POTATOES
5 lbs. Yukon Gold (cut in half) 
OR 
Large Red New Potatoes (notice the size in the pic)
1 stick of Land O' Lakes Butter (or more)
1 can of Pet Evaporated Milk
Salt
Pepper

To peel or not to peel...that is the question!  I personally like the skins on but some of my family does not so today I caved and let them have it their way.  But they are good either way!

Make sure your potatoes are relatively the same size so they will cook in the same amount of time.  

Place in a pressure cooker and cover with water and add a generous amount of salt. 
OR
Place potatoes in a large pot, cover with water and add a generous amount of salt.

**I have made them both ways...just depends on my time frame as to which one I decide to use.  For this post today, I have used the pressure cooker.

Place cover on pressure cooker and turn burner to high.  When the steam begins to escape and the regulator begins to vibrate, turn heat down to medium or where the regulator is vibrating steadily but not radically (that is the only way I know how to describe it).
Cook for 8 minutes.
Let the steam totally escape before removing the lid.
Check the potatoes to make sure they are done.  If a fork goes through the potatoes without hesitation and breaks apart slightly then they are done.
  
But if you hit a hard spot, then the potatoes need more time.  Return them to a boil and check them every couple of minutes until they are done. (I don't think this will be the case after 8 minutes in a pressure cooker but it all depends on the size of the potato)

If you are using a regular large pot.  Bring the potatoes to a boil for about 30 minutes.  Follow the instructions above for checking the potatoes for doneness. 


Pour the potatoes into a colander immediately.  Do not let them sit in the water.  If they are left in the water, they will continue to cook and they will absorb more water.  The consistency will be watery instead of creamy.

Place the potatoes in a stand mixer or a use a large bowl with a hand held mixer.

Add 6 tablespoons of butter to the hot potatoes and mix. Or you could just throw that whole stick in right now....it is entirely up to you...it really depends on what kind of day I am having!  It's like... butter therapy! 

I cannot say exactly how much milk to add to the potatoes.  I always "eye" it.  With the mixer going, add milk until you get it to the consistency you want your potatoes....then add more milk. Because of the starch in potatoes they will continue to "stiffen" after mixing.  So, it always better to have your potatoes a little creamier than you think you want.


I have used half-n-half, whipping cream, and regular milk, but my Mom always used evaporated milk and I really like the flavor and creaminess that it creates.  

Add salt and pepper to your taste.

Melt the last two couple tablespoons of butter.  If that stick is already in the potatoes, go ahead and open the second stick and slice off a couple of tablespoons (or more...this is a no judgment blog here) melt, and pour on top of the potatoes.  Really, there is no wrong or right here...just do whatever makes your little heart happy.

Oh My Gosh....these are divine!!!

I sprinkled a little bit of dried parsley on top of the potatoes just for the picture...I never do this before I serve them though!  

ENJOY!